Showing posts with label before and after. Show all posts

Wednesday, January 9, 2013

Another project from 2012.

Pin It


Because I'm on a "spending diet" here, I can't work on any major projects. And even a couple of smaller ones that I'm really itching to do will require painting, and it's just too cold outside, even in the garage. So that will have to wait.

That's why I decided to share with you a project that I actually finished back in September of last year. I'm not sure why I never told you about it, especially because it's one of my most favorite projects ever.

In our living room (that also doubles as a media room) we always could use extra seating. But for the longest time 3 out of 4 corners of the room had the same coffee tables. Finally, I decided that we needed a chair in one of them. But after looking for a while, I couldn't find anything I liked. It was either the color or shape, or, most of the time, the price. The thing is, I wanted something bright, a pop of color. Honestly, I wanted my favorite color - teal. Unfortunately, teal colored chairs are rare and expensive (like the one right here). I knew I needed to cut some corners.

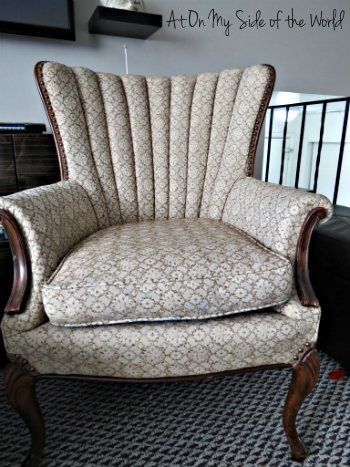
After looking at thrift stores and classifieds, I one day stumbled upon this beauty:

005-15-1

I loved it's shape and trim work. I absolutely hated the color (especially next to our old carpet :). You can't really see it from the picture but it was actually pretty beat up. The previous owners - a cute elderly couple- had it sitting under a porch for a while. But it was only $20, and I couldn't resist.

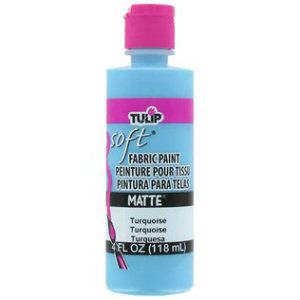
At first, I was thinking of reupholstering it. I knew I couldn't tackle it by myself (just look at the chair back alone!!). But after an appraisal, well...it was cheaper to buy new! So after looking online and getting inspired by some very crafty people, I decided to...paint it. Yep, you heard me right! I painted it using this:

468215_2

I think Hubby thought I was crazy at first... Let me be honest with you, it was not a VERY cheap project considering the price of each bottle was about $7 at Michaels. I ended up using 8 bottles but I bought every one of them with a 40% coupon. This project did require some patience while I accumulated all of the paint :)

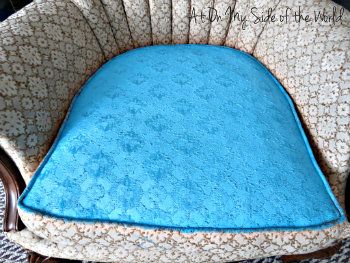
In a bottle this paint looks this pretty teal but as I started painting, I got this:

011-3-1


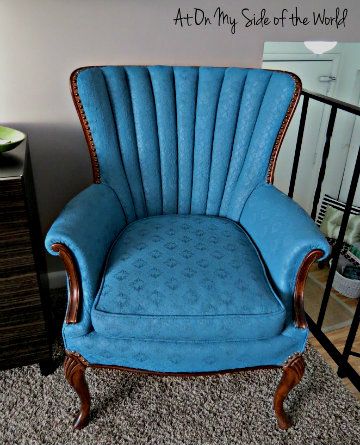
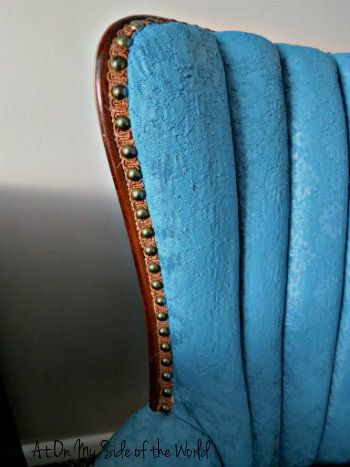
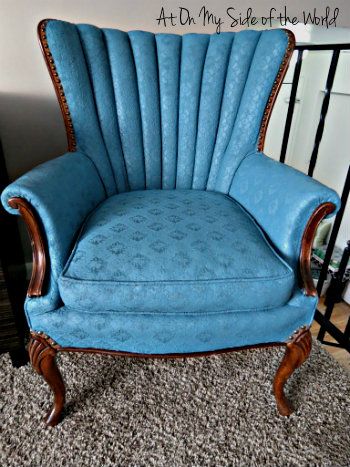
A fluorescent aqua-blue...Brrr!! So I went and got another bottle of black paint. I only needed a teaspoon of black per each bottle of turquoise to get a color I wanted. I used a soft brush and  it took two layers of paint for full coverage. Originally the fabric of this chair was kind of scratchy, and after I painted it, it feels a little more like vinyl. And that's how it looks right now:

005-16-2

L.O.V.E! It looks exactly how I wanted it (and even my Hubby loves it now). I haven't decided yet if I want to paint the wooden parts but I do want to keep the trim, so more than likely I'll keep it as it is:

007-3-2

And here's my favorite chair, people. I often curl in it with a book, and kids love to play on this chair too. It's very sturdy and gives our room just the pop of color we needed. One more picture, a little bit closer:

008-4-2

Unfortunately, the pictures don't show the real color (I'm still learning to use my camera) because the color is subtle teal, more like the inspiration chair from World Market. And this chair ended up costing $60 which is more than $200 in savings. As I said it wasn't cheap but you still can't beat the price.

Now I wonder why it took me so long to share it with you? :)

I shared this project with these awesome parties:

My Turn For Us 


Blissful and Domestic
HookingupwithHoH  
Chic on a Shoestring Decorating

mop it up mondays feature
Button pic 9
Furniture Feature Fridays UndertheTableandDreaming
TDC Before and After

Friday, January 4, 2013

January Challenge update #1.

Pin It

Yesterday as I was working on some translating, my precious little netbook decided to crash on me, and I lost all of the stuff I was working on :( Wah wah wah...So I had to work till 11pm yesterday because I report on Fridays. Hence, no blogging last night :( Double wah...

But I thought it was time to report on January Decluttering and No/Low Spend challenge

Photobucket

FINANCIAL.

You might remember that my original goal was to spend no more than $465 ($15 a day) on food, necessities, eating out, clothes, entertainment, gifts and miscellaneous. It's the 4th of the month, and I'm well within the budget still.

I did a little bit of shopping because we needed milk, yogurt, and some fruits and veggies. I also went to Rite Aid to take advantage of a nice deal on Pantene shampoo and conditioner ($1 a bottle) because I was almost out of shampoo. I used $2 in UPs rewards for it. But that's all the spending I've had so far.

Goal: > $465
Spent: $ 16.46

I will do some secret shopping tonight and have to make a purchase. But I will get paid for it (still will be part of expenses because I will only be paid in February). Then we decided to go to Applebbees tonight but we have a gift card and a coupon for a free kids meal (that Kid can't wait to use). So this will be free. We are running really low on cereal, so I see a shopping trip coming very soon. When you have kids, it's a lot harder to save...sigh..


DECLUTTERING.

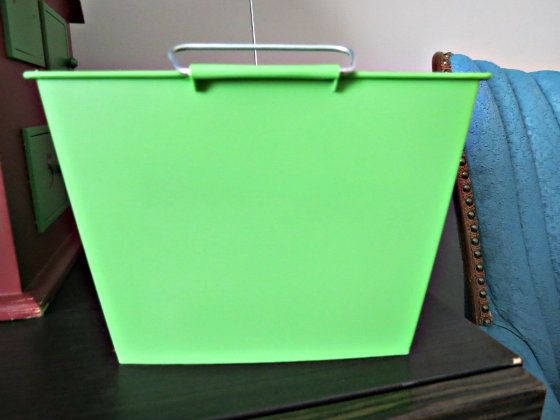
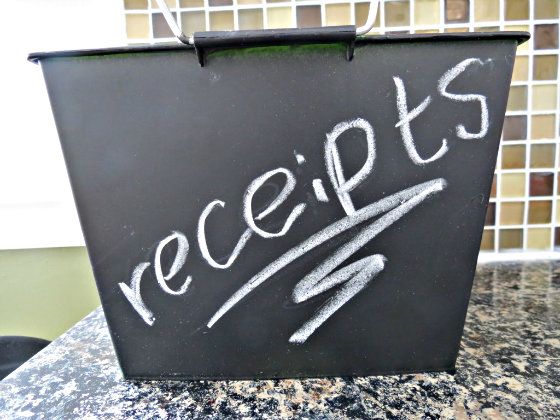
A mini-goal that Carla gave us this week was to find what "thing" clutters up our home the most. And it's definitely papers. One of the things we noticed (that has everything to do with finances too) is that its sometimes hard to keep track of all the receipts- or to see what we spent money on- because we tend to lose them, forget them in pockets (and then wash them), throw them away and so on and so forth. So I decided that I needed an assigned space just for receipts that will be easily visible (especially for my husband). So a week or so ago I bought this ugly green (but cheap) container from the $ store:

002-12-1


As much as I love green, it absolutely didn't match anything in our house. So I spray-painted it with leftover chalkboard paint, and now it has a special place in our kitchen. I love it:

002-11-1

Now it's all visible and easily accessible, and all the receipts go in there. Then once a week we sit down together with Hubby and do our budgeting.

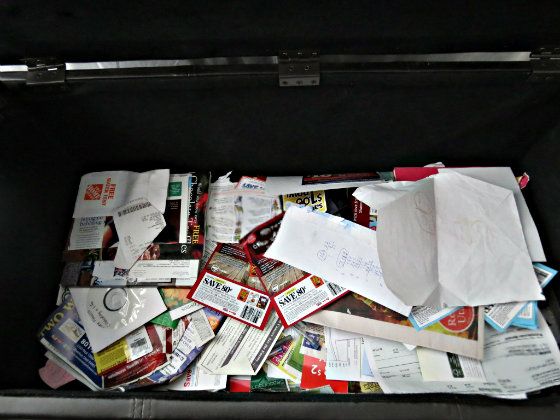
Another thing that I really needed to organize was my coupons. I haven't done much couponing in a while but I thought it was time to come back this year (at least somewhat). I keep all coupons and other discounts in an ottoman in the master bedroom. And that's what it looked like before:

002-10-1

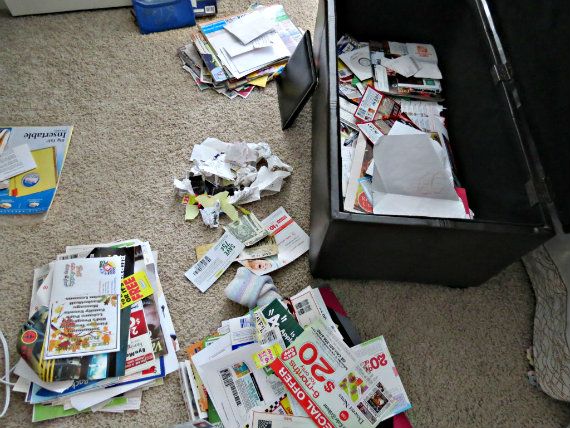
What a sad picture...Most of this stuff expired months ago too. So I cleared it all out and organized it. That's what our bedroom looked like for a couple of days while I was organizing:

001-17-1

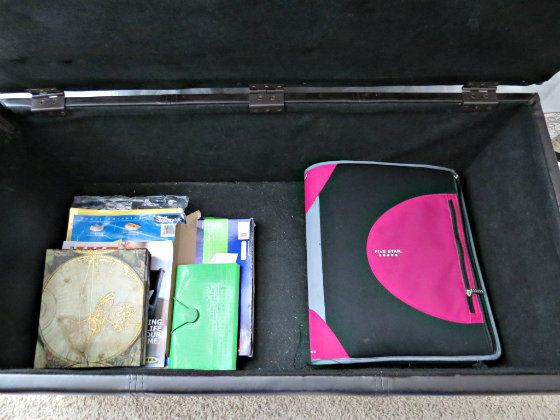
But now it looks so much better! I have a nice binder for coupons and some old photo albums to keep rebates and some need-to-be-used-soon coupons:

004-17-1


Aww, much better. Now I just wish I could keep it this way...That's going to be a challenge in and of it's own :)

Friday, December 28, 2012

The last big project of the year.

Pin It
How was your  day today? Hubby had a short day so we decided to go to the movies (used a giftcard that we got for Christmas) to see "The Hobbit". I read the book when I was about 11-12 years old, so I was surprised to see how much I still remembered. It was fun!

Otherwise, I worked all day and also cleaned a ton. We are having a little Christmas get together with my sister on Sunday, so I tried to make this house at least somewhat acceptable for hosting.

So I'm absolutely exhausted today and my brains are not functioning properly. That's why I thought that instead of a long post full of goals and plans, I would share with you our last big project in 2012.

You might remember that for our carpet in the living room we saved a little over $600. Well, turned out that we only needed $400 out of it, so we had about $210 left. After we used $30 for a Christmas gift budget shortage, we were left with $180. First, we wanted to just put it into savings but then we decided to finish a project I've been dreaming about for a while.

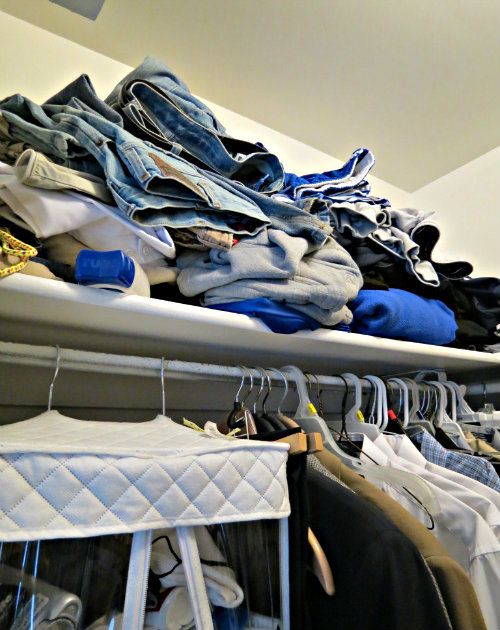
If you ever watched "Clean House" I always drool over those nicely organized closets that Trish creates. When we were buying this house, the walk-in closet in master bedroom was definitely one of the selling features. It's not big and very soon we realized that it doesn't have enough storage (or more, that we didn't use it wisely). Here's what my Hubby's side looked like:

005-13-1

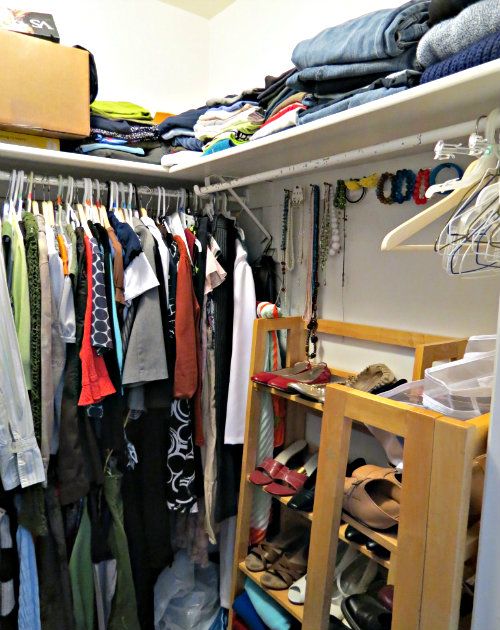
Yep, no comments...And this is what my side looked like:

004-15-1


Well, it's a little better... But these huge bookshelves that were holding my shoes and sweaters were just taking up way too much useful space. So we decided to re-do our closet and make it look fabulous but all on a budget.

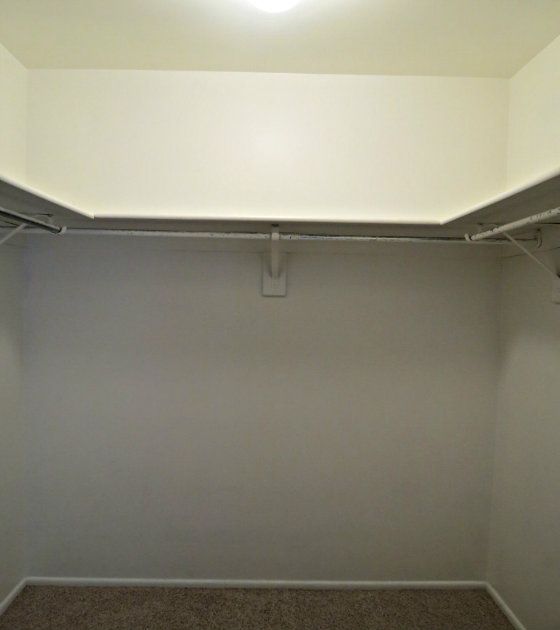
First, of course, we took stuff out and cleaned it:

003-13-1

Then we re-purposed a few things we already had. First, I sanded, painted and primed a little shelf that my MIL gave us a few months ago. As usual, I forgot to take a before picture but it was a basic oak shelf:

023-1-1

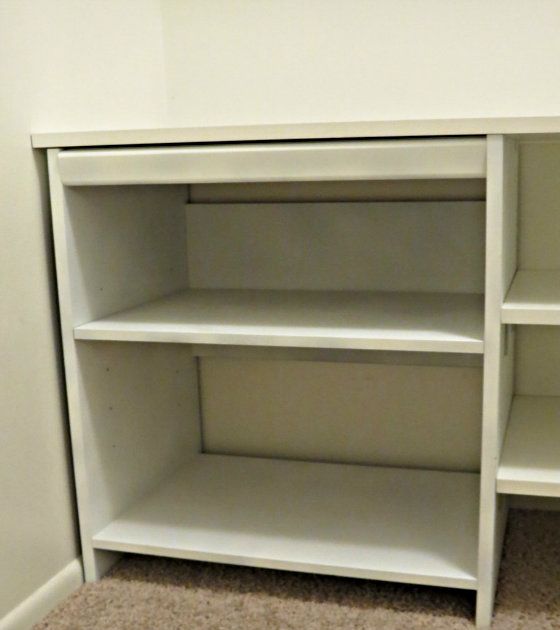
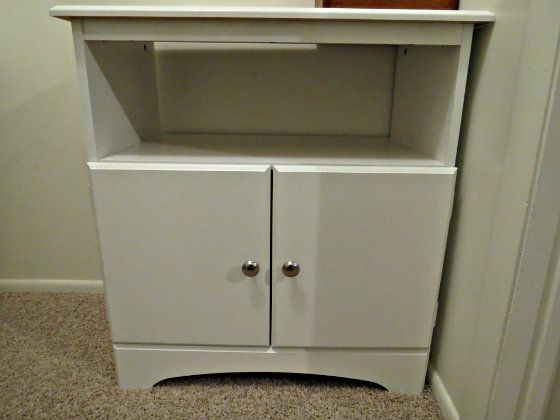
Then we used a little storage unit that I originally bought for a bathroom (on clearance at Walmart for $12.50) but it turned out to be too big for the space. But it works just perfect in our closet:

024-1

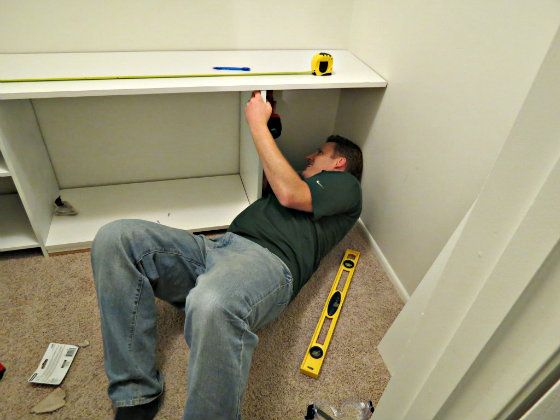
The rest of the materials we got from Lowes- some pre-made shelves, brackets, millions of screws and anchors...Here's my cute Hubby installing it all:

005-12-1

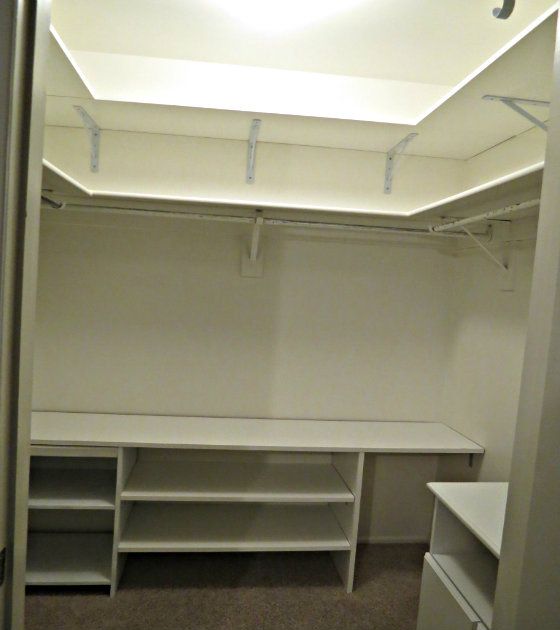
Isn't he a cutie? :) And cutting straight to the chase, here's a finished product:

022-1-1

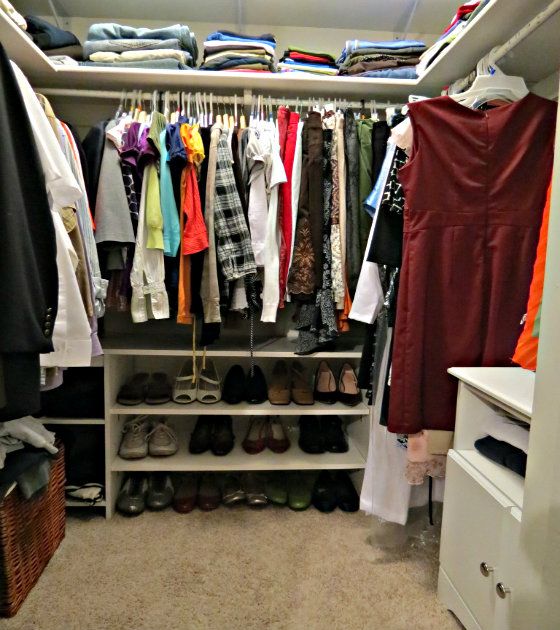
Love it, love it, love it!  Here's another picture, already with clothes (and shoes:) :

033-2-1


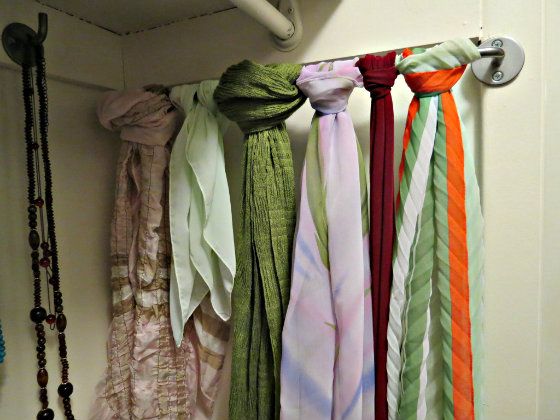
I added a small kitchen rail from Ikea (only $2.99!!) for my scarves:

028-2-1

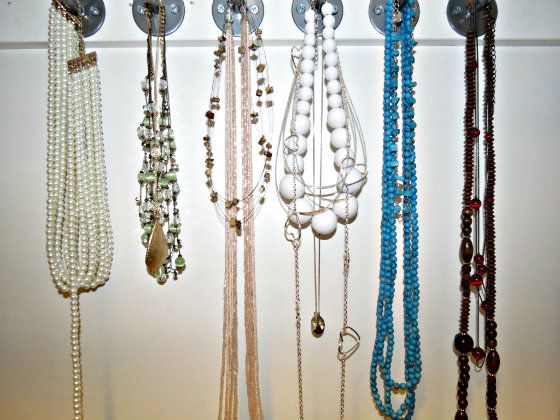
And some hooks for jewelry (and hey, if you decide to rob me, there are no diamonds here :) I'm one of those crazy girls who would rather get a gift card to Home Depot for a special occasion than bling bling...I do like flowers and candies though :) :

026-1

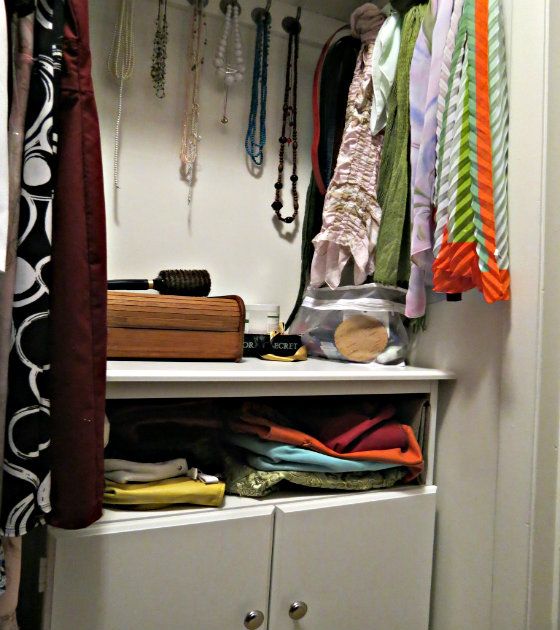
I love that now I have a personal space for MY things like jewels, purses, and make-up:

001-16-1


We have a small mirror on the door, so it works perfectly. Total cost of the whole project: $176. All paid for with cash. And now I have my (almost) dream closet for a fraction of the price of what it would cost us if we used a pre-made version.

And here goes our last big project in 2012...Phew, now I need to go and get some rest...

PS. - and just so you know, it was actually finished two weeks ago, and Hubby's side still looks perfect and organized. Aww, I'm so proud of him :)

I shared this post with these great parties:

Blissful and Domestic 
DIY Project Parade 
Thrifty Decor Chick's Before and After 

Thursday, December 13, 2012

A very budget-friendly coat closet update.

Pin It            

OK, winter is officially here now! Even though the past two days weren't very cold but we still have snow on the ground and our gas bill was $20 higher this month.

   So a few days ago I realized that I don't even know where our winter hats are. Or, should I say, I do know where they are hiding but finding one is what the problem is. And all because until today our shelf in our coat closet looked like this:

001-10-1

To my defense...nah, there is no defense! It was just a mess. We haven't really needed anything on this shelf since last March, I think. But now that I actually tried to find something...well, I was DONE. I needed to organize this place. ASAP! The only thing is that I didn't want to spend money on it. And I didn't! I used what we already had in the house.

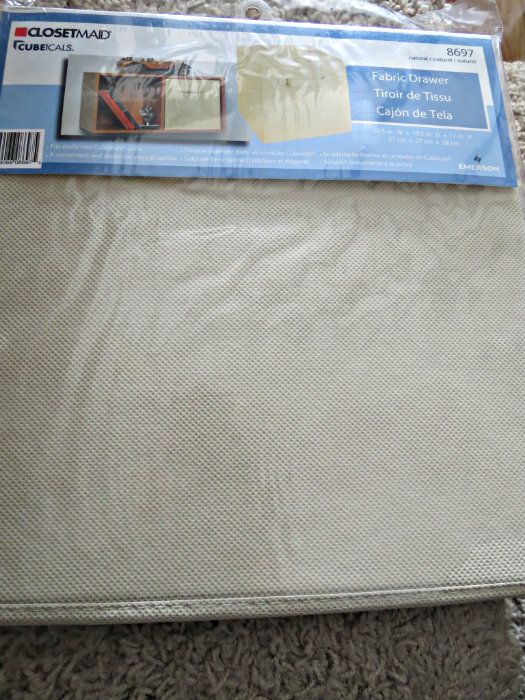
A few months ago I stumbled upon a sale at a local Lowes for these fabric storage bins:

003-9-1

Honestly, when I bought them, I didn't know how I was going to use them. Do you ever buy things when you don't know what you will do with them? I rarely (and I mean, rarely) do this but it was one of those times. I guess, I just couldn't pass a price tag of $1.50/a piece. I got three of them.

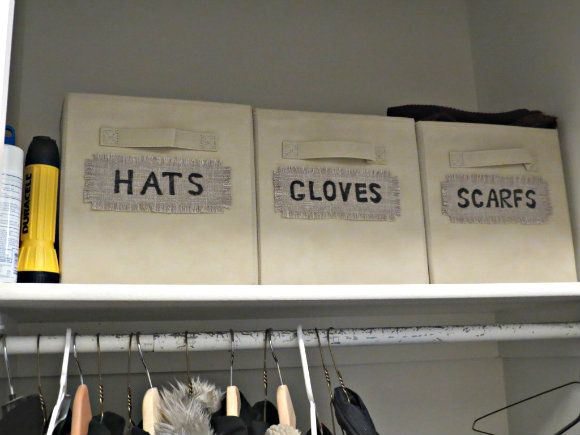
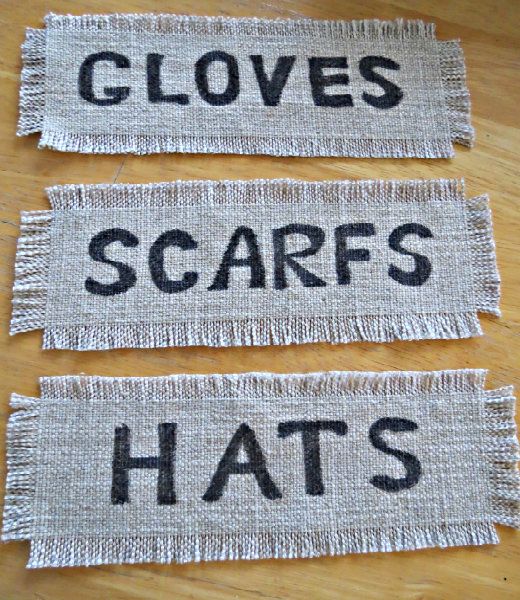
And when I started to think of a possible storage, I knew they would be perfect in this space. I added tags to each box (made from scraps of my favorite linen fabric and Sharpie):

001-11-1

And that's how it looks right now- TADA:

002-4-1

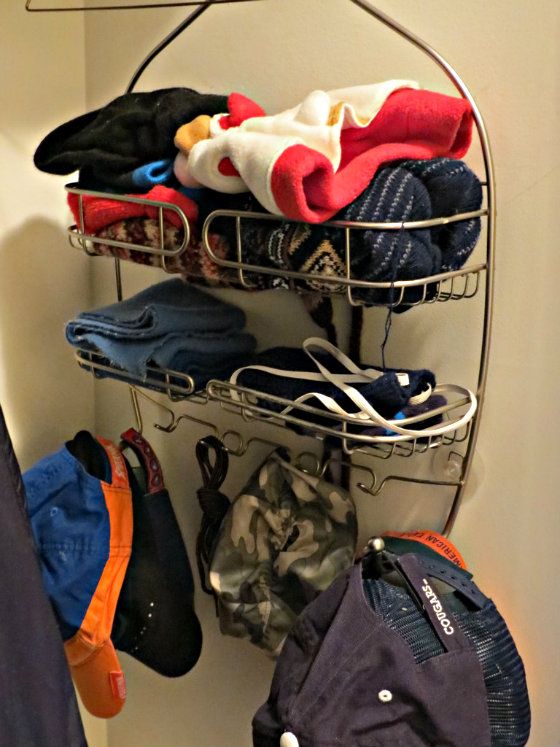
I love it, love it, love it! Now I know where everything goes. Winter, I'm not afraid of you any more...Umm, maybe, I shouldn't have said that... I still can't stand cold... But here's my little project of the day. I actually added just a little more storage by re-purposing a shower caddy, that was sitting in our garage, to store kid's things that we use all the time and for storing baseball hats:

004-9-1

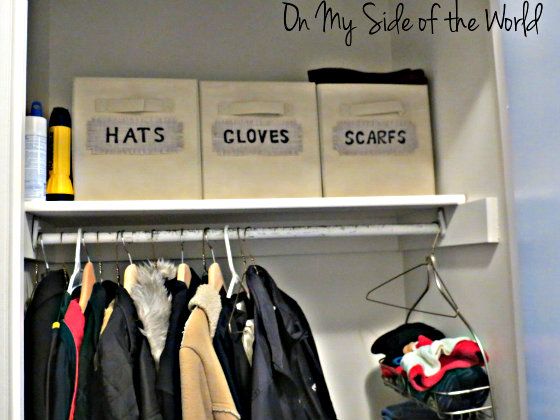
So here is one more picture of a finished project using what I already had on hand:

003-8


Doesn't it look so much better? I'm really happy with a difference just a few simple changes made. And I'm one step closer to having our life more organized. Now I can't wait to finish our master closet. Stay tuned...


Saturday, December 1, 2012

A gift I really really wanted this year...

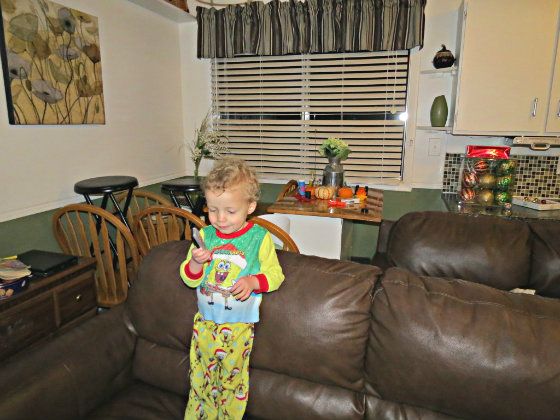
Pin It              Now I got all of you intrigued, right? :) Well, there was one thing I wanted to do before Christmas. I'll give you a hint. In the past two days our kitchen looked like this:

012-3

(Sorry for the dark picture. As you can see, I took it right before somebody's bedtime :)

And even though the kitchen is the center of the house and all that, I don't think I'm ready for a couch in there...You, probably already guessed what happened.

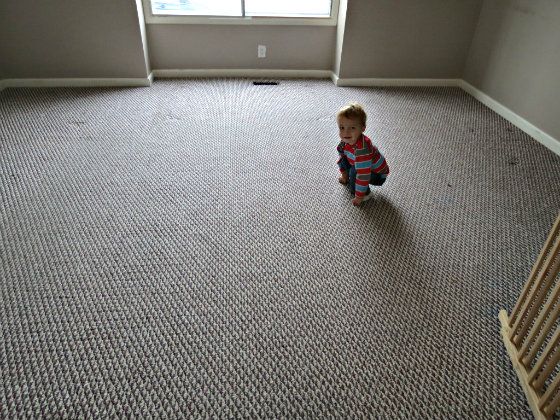
And you are right! Good bye, to the old purple-ish carpet...

001-7-1

Oh, I wish the picture could show the real color. I promise, it wasn't brown. It was PURPLE!

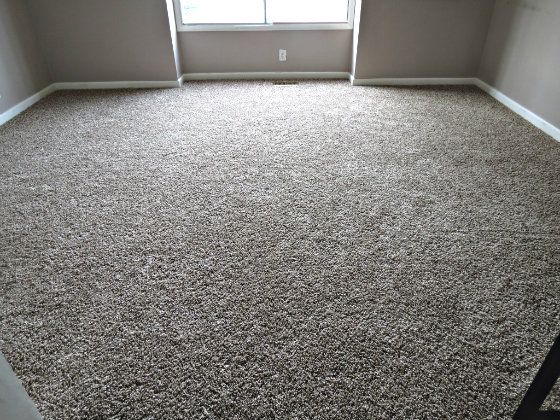
And say "hello" to the new pretty, neutral color:

002-2-1

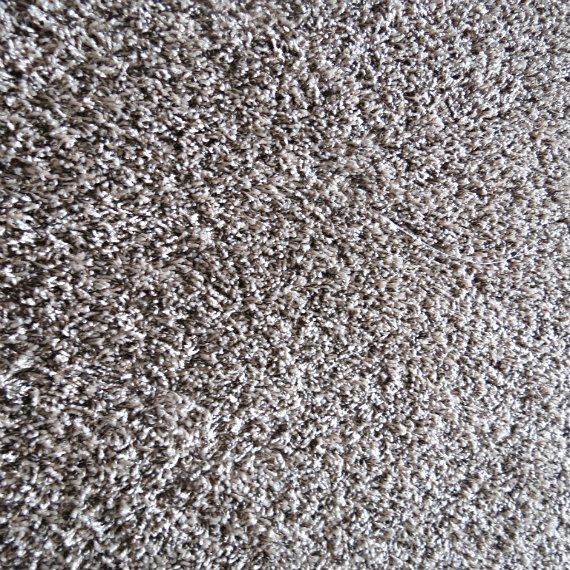
And a closer look:

003-7-2

 I love it!! And I almost didn't get it this year (which would be OK but I really wanted it). You, probably, remember that we were saving the money I made with translating for new carpet. We saved a little over $600. But when we started getting quotes, we realized we needed at least $200 more. We felt $800 for an 12x15 room was a little steep, so we decided to sit on it until next year.

And then our friends got new carpet...with a self-contractor guy...For 3 times cheaper than your big-box stores. We were a little skeptical at first but when we went to see their house, we liked it and thought it would be worth it to get a quote from this guy. He brought us a few samples, and after we chose what we liked, he quoted us...dum dum dum...$410! And this price included new carpet with a very nice pad, and the old carpet removal and haul. It was half the price of the lowest quote we received, and $200 savings for us to use somewhere else.

And that's how I got a gift I really wanted and for a nice price...

Now I better go move some furniture around...


Tuesday, June 12, 2012

So what did I do with that lovely fabric??

Pin It             I love color. I love it in my clothes, in accessories, in home decor. Hubby doesn't care about color as much. His perfect living/media room has tan-colored walls, leather couches and a big TV.  And that's what we had for a couple of years until I got really tired of it. In this room we also had some very plain lamps. We got a 4-piece set of black and white lamps on clearance at Target a few years ago. They were extremely boring but so practical, and for the price of $35 for the whole set we just couldn't turn this deal down especially because lamps are the only source of light in this room. So that's what the originals looked like:


   Sorry for such a dark picture. This mini-lamp now sits in my son's room, and I snapped this picture right before his bedtime (it's the last unfinished lamp from the set).
   So at first I decided to add at least a little bit of color and painted the base of the lamps this lovely turquoise. I did it like a year ago :


   It was OK but it never felt finished for me. Then last week I discovered a new-to-me and my now favorite store- Hancocks Fabrics. I swear, I spent 2 hours there just walking the aisles and falling in love with their choices. I ended up buying these:


   Aren't these lovely? As soon as I saw these fabrics, I knew what I wanted to do with them. I decided to make new shades for our lamps. It was my first time ever. Here's what  I did. It is a no-sew project. Instead, I used fabric glue, spray adhesive and a double-sided iron tape. That's it! First, I removed all the trim off  of the original shades:


   Then I rolled and traced each shade on fabric and added some more space for folding (I just noticed that I made this picture before I actually removed the trim. Oops...)


   Sometime during the process I got a little helper to assist me too :)

             
   So I cut out my fabric, sprayed the shade lightly with the adhesive and wrapped fabric around it tightly smoothing all the imperfections and leaving extra hanging on the top and the bottom. I then wrapped the extra fabric around the edges and used fabric glue to attach it. Then I cut out the new trim and added double-sided tape inside:


 I again used my trusted fabric glue to attach it and also cloth pins for better adhesion:


   And here's the finished lamp. What do you think?


   I love it!! And what's even better is that Hubby loves it too!! :) I also made a few pillows to add some color to the couches too:


   I never know how to make pictures of pillows! I made two of these blue ones to add to a couple of blue and brown that we already had.

   I really enjoyed this inexpensive and easy project. For about $15 total for three new shades- you just can't beat that! Eventually we want to get some bigger and "chunkier" lamps but for now I love what we've got. And I just can't wait to start working on a new DIY adventure!!

I'm linking this project to milkandcuddles.com , www.familyhomeandlife.com and www.gingersnapcrafts.com Wednesday linking parties. Check out other awesome projects there!
Related Posts Plugin for WordPress, Blogger...