Showing posts with label DIY. Show all posts

Saturday, July 19, 2014

The diamond in the rough...

Pin It

Hello, hello, my lovely friends!

I hope you all have a wonderful weekend. Ours is chock full of fun with family and friends. I really enjoy spending time with them but, man, this girl is exhausted! I can barely drag my feet today...

But I know I promised to tell you how much I spent for the dresser :) No Terri, it wasn't free :)

Last week we all went to Toys R Us to use my oldest son's Birthday coupon (the perks of signing the kids up for the Birthday Club - $5 to spend on anything). But very close to Toys R Us is my favorite Goodwill. Of course, I couldn't pass it up :)

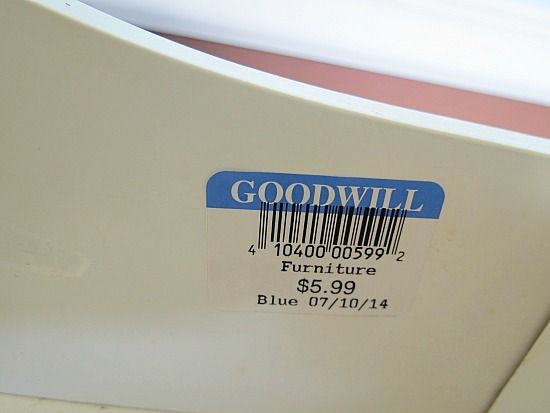
Before I knew it, I was in the furniture department.  And here it was... my diamond in the rough. For the most unbelievable price. (insert drum rolls, please!!):

 photo IMG_1337_zps00ffb223.jpg

Yep, just $5.99 (Cindy, you were the closest with your guess on Facebook :) I couldn't believe my eyes at first. Score! I immediately called my husband and told him that we are getting it. To sweeten the deal even further - even though it was super-sweet already - I used a 20% coupon that I got after donating a bunch of stuff to them, so in reality I only paid $4.69 for it. As I mentioned in yesterday's post, it's very solid though does need a bit of help. But all of it is cosmetic, and I can see this piece lasting us for years and years to come.

And this is my major score for the month :)

And did you get any good deals lately, whether in a grocery store, from thrift stores or classifieds, or, maybe, yard sales??

Tuesday, May 13, 2014

An "emergency" tooth fairy pillow.

Pin It

Our oldest is 7.5 years old. He's fun, witty and so handsome. He's also very impatient. And one thing that was making him grow especially restless was something that is common to most of his classmates - and that is losing his first tooth! I swear, he's literally the last kid in his class!

He actually started getting "the big boy" tooth behind his baby one.. We took him to the dentist a couple of weeks ago about it. We thought he would pull it but he said that the baby tooth was already wiggly, so it wasn't worth it (I guess, it did save us some money...). Well, two weeks later it was finally out...

I mentioned here before that I'm a major procrastinator! I have something in mind but I keep thinking and thinking about it and putting the ideas aside for a while... I really wanted to make him a cute little "tooth fairy pillow". I even bought supplies. Like two months ago...

So when I saw him running out of his room on Mother's Day - well, actually, night - I knew I had to make one asap. Luckily, it was pretty easy and only took me about half an hour or so (if I knew it would be that quick, I'd probably have made it sooner...Duh...). No tutorials here but as you can see it's pretty self-explanatory:

 photo IMG_1109_zpsb6833eb6.jpg

And it turned out cuter than I thought it would :) My little guy had a moment of disappointment when he realized in the morning that it wasn't the "tooth fairy" who made it (HA!) but then he gave me this long look of approval... And a hug...

And those moments are the best and worth staying up a little longer once in a while...


Sunday, May 4, 2014

The Pinterest-inpsired "aha" moment...

Pin It

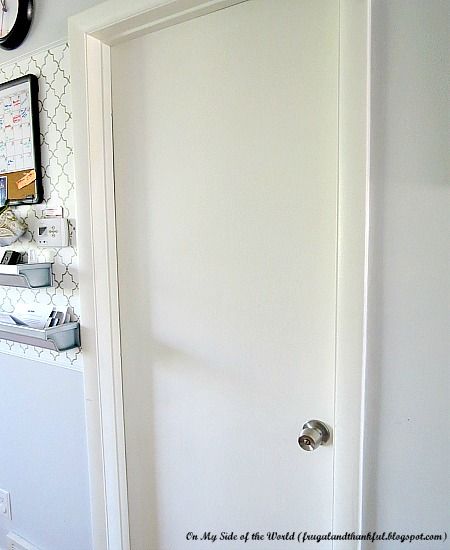
Our house has a semi-open plan. We don't have one big room but there is a small hall that connects the living room and the kitchen. On the right in this hall there is half-bath (the one we remodeled on a super-low budget last year). It's very convenient for guests:

 photo IMG_1076_zpsda287901.jpg

And yes, next to the door is our new command center that we still love and use it every single day. On the left we have a tiny coat closet:

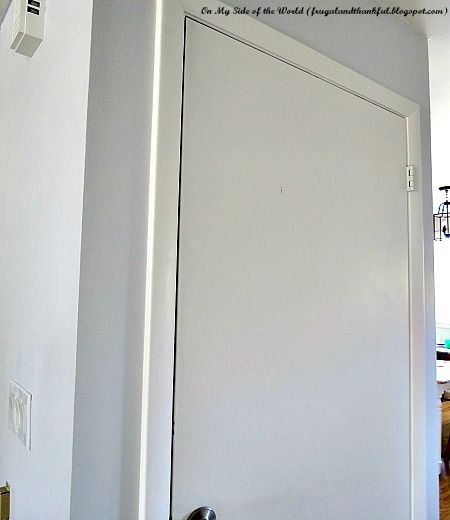
 photo IMG_1077_zps4bdb580c.jpg

I can't tell you how many times somebody tried to go in there instead of the bathroom! Just ask my best friend :)

The other day I saw this cute idea on Pinterest, and a light bulb lit in my head. Candice found those wooden figures in Michaels. You can imagine that I immediately sprinted there and spent good 40 minutes fruitlessly looking for the "boy" and the "girl". I guess, it wasn't their stellar item because they don't carry it any more.

My crafty soul felt dissatisfied... And then I had another "aha" moment when I saw a black foam sheet... For only 89c. I grabbed it and ran home...

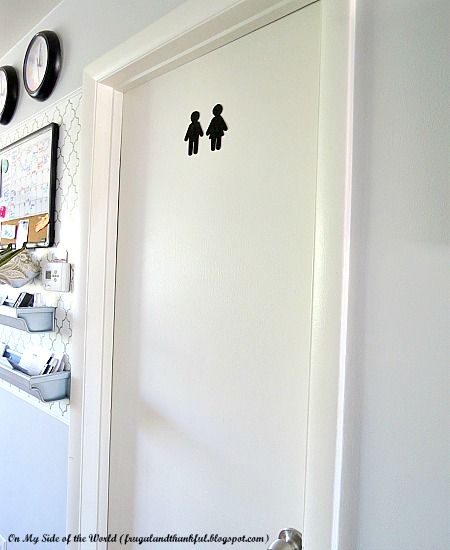
I printed the outlines of the icons off of mister Google Image and traced and cut them with an exacto knife. I can't drag the explanation any further :) It really took me about 10 minutes tops. The best part is that the foam paper has a sticky side, so all I had to do was trace-cut-attach. They are easy to remove and not gonna bother the next family when we decide to sell this place. But for now I love them:

 photo IMG_1081_zps0cd5d58d.jpg

I do sacrifice some entertainment here watching my best friend trying to break into our closet every time but I think she and some other people will appreciate this new addition to the bathroom door:)

 photo IMG_1084_zps41f04e70.jpg

Thrifty Decor Chick       DIY Show Off       By Stephanie Lynn

Wednesday, April 16, 2014

Finally a little project to show you :)

Pin It

I have a confession to make... I have a big pet peeve! It annoys me so much when people don't take their shoes off at the door when they come to your house. I guess, it's my upbringing speaking... But seriously, I can tolerate when it's sunny and dry outside, so you barely bring any dust in (even though I still don't know where your shoes have been!) but when it's raining and muddy... Really?? I do have children here. And I myself like to run around bare foot...

When the kids were younger, I obsessively wiped the floors after the guests would leave just because...well, babies crawl and eat everything off the floor! I still sometimes grab the broom... And with my closer friends I gently hint. But what to do with other kinds of acquaintances?

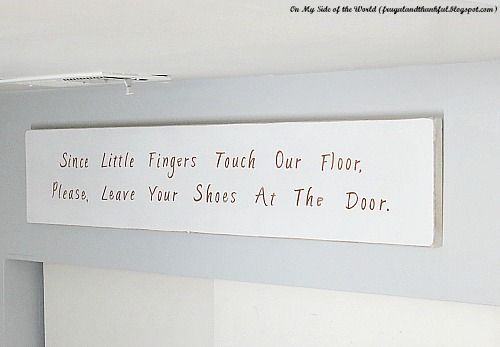
A few months ago I saw a similar to this sign on Pinterest and fell in love with the idea behind it. But since I didn't have $40 to pay for it (incl. shipping), I thought I could make something similar, even if it's less fancy.

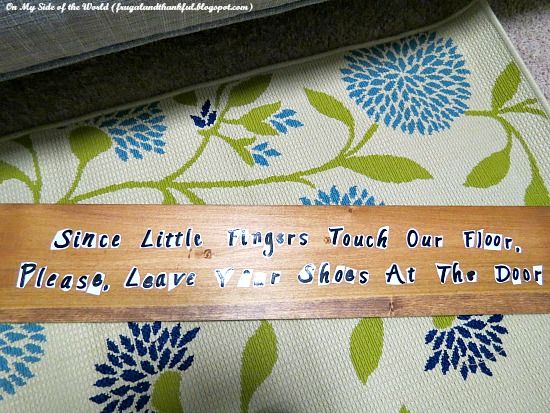
I used a board I already had and just stained it with leftover stain. I don't have a fancy vinyl cutting machine of any sort, so I had to turn to simple premade letter stickers:

 photo IMG_0977_zps14385caa.jpg

(by the way, check out the new rug we got for the "dreaded room"! We kind of slowed down working on it because of all the beautiful weather outside and a desperate need to dig my pitiful garden...But I'm just in love with this rug!)

So I just put the stickers on, painted over the whole thing, carefully removed them and slightly distressed the board. I really don't have any step by step pictures because it's just too easy!

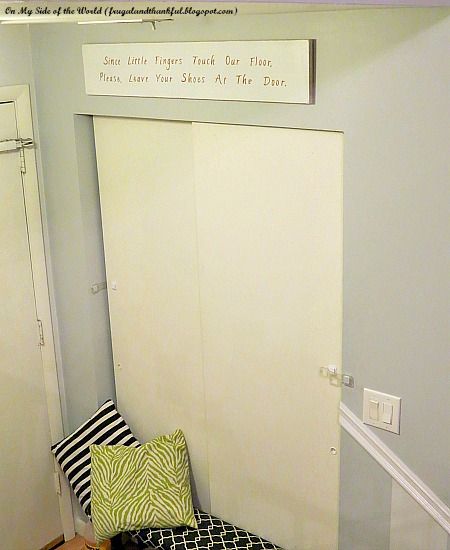
But that's what we have hanging in the hall right now :)

 photo IMG_1055_zps768c7ba0.jpg

I tried to take a better picture but our hall is really so dark:

 photo IMG_1061_zpsaa84fe46.jpg
But here's the finished product.

Now am I too blunt? :) Well, you know me well then :)

Does it bother you when people don't take their shoes off when they come to your house, especially when you barely know them?

Sunday, March 16, 2014

My first ever burlap wreath.

Pin It
Last year I painted our boring black front door bright turquoise, and it was love in first sight... But ever since I did it, I wanted to make one of those cute burlap wreaths that you see all over the web.

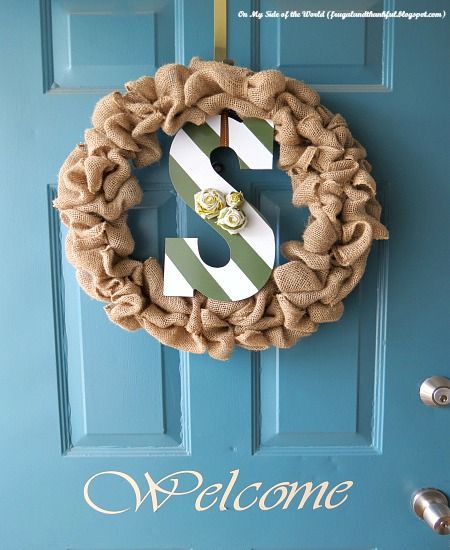
This week I finally bit the bullet... Now I just grossed myself out imagining a burlap bullet in my teeth... Yuck. But anyway, here it is:

 photo IMG_0937-2_zpsda32a71f.jpg

This wreath cost me about $10. I only needed to buy three things:

 photo IMG_0922_zps376badb1.jpg

Guess, whose kitchen table is in desperate need of refinishing? I temporally lost my craft area due to remodeling of the guest room (where I permanently occupy a closet with my sewing machine), so I had to use our kitchen table to the dismay of the rest of the family - oh, who am I kidding? The boys would eat on the couch in the living room rather than at the table any day. I digress...

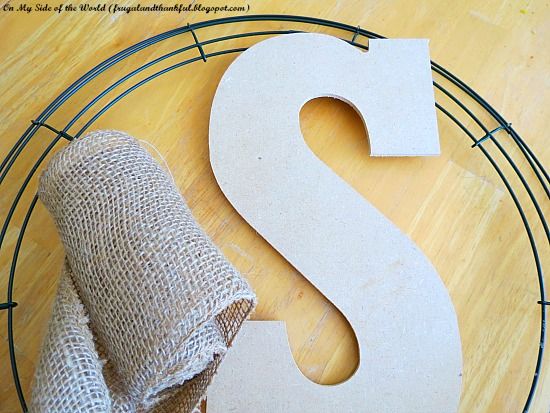
So I only needed to buy three things - a 10 ft roll of burlap (got it from Michaels for about $5 after 40% coupon), a metal form (ab. $3.50) and a big MDF letter that came from Hobby Lobby (on sale for only $1.50). All the rest of the stuff I needed, I already had on hand.

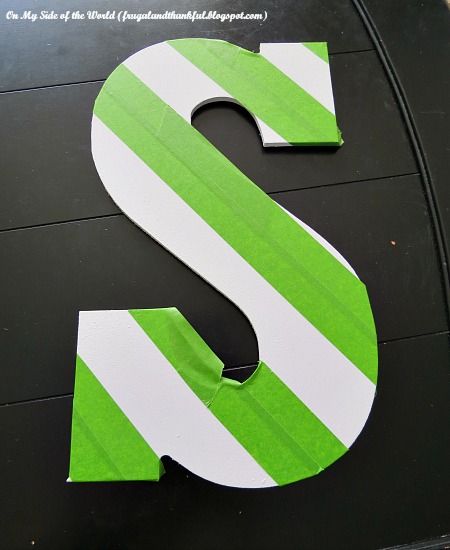
So, first I primed the letter, painted it white and taped to create stripes:

 photo IMG_0924_zpse44f720a.jpg

I then used some leftover spray paint in forest green. While the paint was drying, I made the actual wreath. I'm not going to post a tutorial because, honestly, there are hundreds of them online, and it really is a 15-minute project, very easy to make. Two warnings though: first, is that 10 feet of burlap was BARELY enough to cover the form. Next time I would get some extra just in case. Second is that if you have allergies, especially to dust, be sure to borrow a heavy-duty gas mask from somebody (dead-serious here!) because the burlap lint stuff will be EVERYWHERE and you are guaranteed to sneeze for the rest of the day. It's not my first time to work with burlap (I even made the stockings out of it) but it was for sure the messiest.

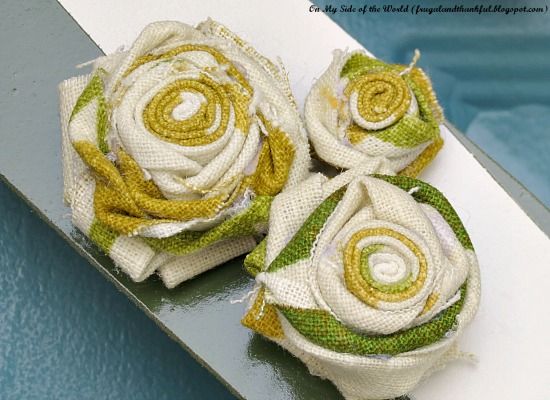
To "fancify" (is it even a word??) the finished product a bit, I added fabric flowers made from some scrap fabric:

 photo IMG_0930_zps413106d4.jpg

I think, from the beginning to the end, it only took me about an hour (minus the drying of the paint).

Ta-da... Why did I wait for so long??? I do love our front door even more right now. Thank you for stopping by :)

 photo IMG_0938-2_zpsb585376d.jpg
I shared this project with these awesome parties:

By Stephanie Lynn     I should be mopping the floor     Uncommon Designs     Ginger Snap Crafts
Family Home and Life     DIY Show Off      Love Bakes Good Cakes    The Shabby Nest  
The Chick on a Shoestring Decorating      The Mandatory Mooch    Natasha in Oz   Thrifty Decor Chick

Saturday, March 15, 2014

The pleasures of customer service...

Pin It
The last couple of days have been just crazy. It seems like I can never catch up on things. The housework keeps piling up, my job is picking up, now one of our boys is sick. Aaaa... How, how do you all, amazing ladies, balance being Moms, wives, sisters, daughters and all the other responsibilities that you face every day? Yes, I feel a little overwhelmed and slightly frazzled today (I promise, you don't want to see what my hair looks like right now...)

For the past few days we've been trying to work on our future guest room but it seems like there is always something else that demands our attention.  Especially when nothing goes right! Like it was today.

We are making a new book shelf to contain a ginormous amount of books that we have. We got some premade shelves and wanted to top it with a finished wood slab. We measured and remeasured and finally knew exactly what we needed and what was in our budget. And than we headed to Lowe's...

We picked up a nice-looking 12-inch wide board that was a little too long, so we had it cut to our measurements. We bought it back on Thursday but only got to working on it today. Imagine our surprise when we tried to line it up with the shelves (again, to double-check that everything was right) and realized that the wood was not wide enough! In fact, it was missing almost an inch, less than 11 1/4 instead of 12.

Long story short, Hubs headed back to Lowe's and received the cold shoulder there. They were so rude! They told him that they didn't care that it was the wrong size, that they are not responsible because they don't cut their wood but get it from somewhere else, that as wood dries up, it shrinks, that after the wood was custom cut (when they made it shorter for us), there was nothing they could do. OK, maybe, for some seasoned DIY pros out there, it's a no-brainer that you need to have an extra measuring tape with you every time you shop a hardware store but we are still novices in that. But seriously when I go to a store to buy a dress of certain length, I don't expect it to end up being a whole inch shorter and think it's OK. Maybe, I should buy less dresses and more lumber, huh...

The ordeal still ended up to our advantage. After my very nice and quiet husband threw a small fit (blame it on a long day!) they finally, well, after some verbal vulgarities, called a regional manager who told them to give the money back. I know, it was only $12 but, hey, I could use it somewhere better, right?  Since we still need the wood...

And how was your day??? I hope it was much more pleasurable than ours :)

Thursday, March 6, 2014

It has begun!

Pin It

The only real goal I had for March was to work on the "dreadful room". It's been more than a month since I showed you that room and I'm yet to start really working on it. We did get almost everything out and sold, our 8-year old futon and a desk, for $70 for both. Considering how old they were, I'm pleased with what we got for them. I still need to list two dressers after I clear and clean them completely.

But this Saturday we are buying the couch I talked about in the original post. Unfortunately, IKEA doesn't run very many promotions on their merchandise. We've been looking at other options for the past few months but that couch is still our favorite, mostly because it's bigger than all the other ones  we've looked at.

We decided to buy a couch this Saturday because it's IKEA Appreciation Day, and we can eat there for free if we spend more than $150 on furniture. I've been craving their meatballs and almond cake for a while, so it's a win win in my book :)

But before the couch arrives, I want to paint the room. I thought it would be the easiest step, but boy was I wrong! First, I think, I told you before that the previous owners, or actually the owner and her new husband slash realtor (yeah, it was a messy story...) had painted everything (and I mean, EVERYTHING!) a dirty, nasty off-white color. Walls, cabinets, ceiling, stars on the ceiling, tape that was never removed, dirty fingers, nails, you name it. I spent a nice chunk of today scraping, caulking, patching, washing and wiping. Add silicone caulk on every angle of the room, and now you can imagine how "excited" I was this afternoon...

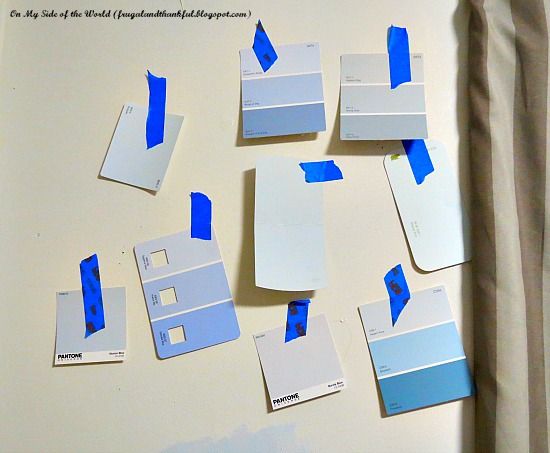
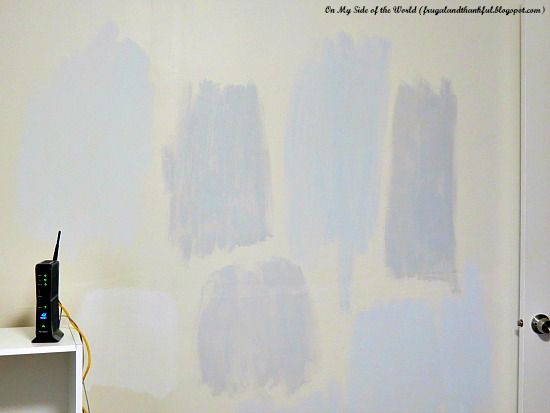
The room is small, and because it's a half-basement, and the ceilings are only 8 feet high, it's pretty dark. So dark that all the colors we were thinking about before for it, seemed too drab. I bought a few samples and tried some leftovers (and mixes of them) from what we already had:

 photo IMG_0883_zpsa70a18c8.jpg

And the attempts on the wall (not all of them are visible but I tried to take a picture that wouldn't be too dark):

 photo IMG_0882_zps98add5cb.jpg

I finally found the color I like (I hope!) - White Lagoon by Glidden (Home Depot):


It's not nearly as dark. And I ordered it at 50% strength to make it even lighter.

Guess what this girl is doing tomorrow???? I'm kind of excited about it. It has begun! :)


Saturday, February 8, 2014

My new pillows make me feel like dancing...

Pin It

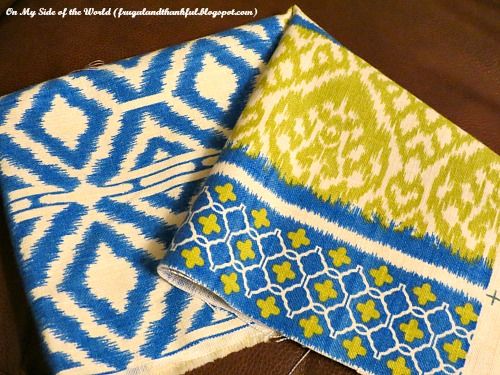
I got this pretty fabric many-many months ago:

 photo IMG_0752_zps9a5c7f64.jpg

It was a leftover piece, and I spent only $3 and some change on it. In the back of my mind I always knew that I wanted to make pillow covers out of it. I just never had time. But it seems like so many of you on blogosphere are doing something house-related - buying and selling, getting new fridges or mattresses, creating amazing quilts and other little trinkets to make your life and habitat a little prettier and easier.

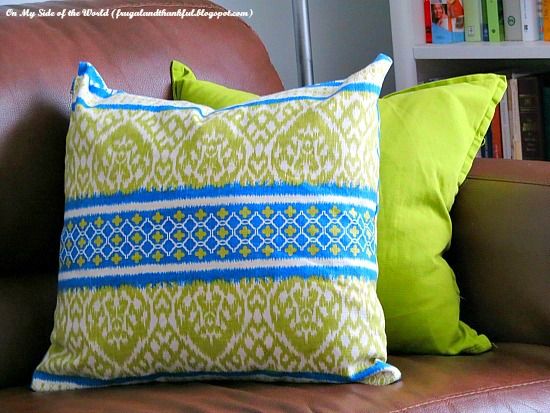
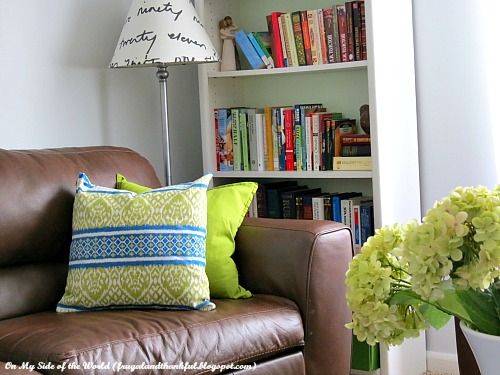
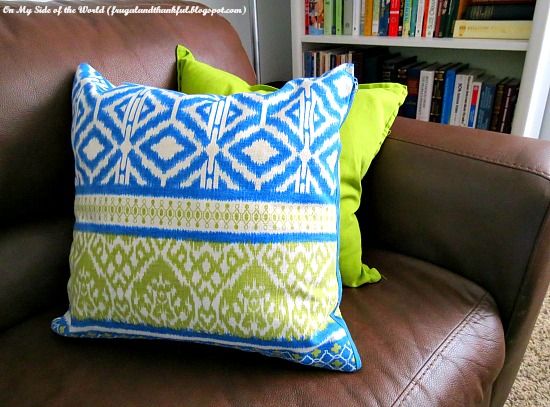
Well, what can I say? You inspired me to dig through my stash (that and trying to clean the "dreadful room". Still work in progress...). When I stumbled upon this fabric piece, I got giddy with excitement. It's exactly what I needed to bring some color and spring mood into our house. They turned out better than I thought(the green one is a $3 Ikea cover):

 photo IMG_0738_zpsd04c2e2a.jpg

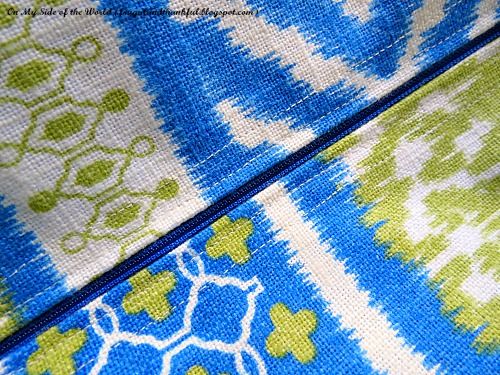
Oh, how much I like this ikat print. Yum! These are very simple pillow covers (I made two but only one is shown on the pic above). I did add a zipper on the side which in itself was quite a sewing achievement for me. Hey, all of you, sewing ninjas, no laughing! The girl is learning here :) My lines actually look pretty straight. Ha! (I said, no laughing!):

 photo IMG_0745_zps6cadd692.jpg

I'm so in love with them. They just scream fun and make me wanna break into dancing. More so, this small project inspires me to make more, to create more. Maybe, even more sewing, who knows (don't count on it too much :)

 photo IMG_0741_zpsb144e377.jpg

I really like how this previously boring, bland room slowly comes together and reflects our bright and funky personalities and my love for color. And if you flip the pillow, it looks kind of different:

 photo IMG_0747_zpsc09a2fe2.jpg

Which side do you like more??

I shared this post with these awesome parties:

By Stephanie Lynn   I should be mopping the floor    Thrifty Decor Chick       The Shabby Nest
DIY Show Off    Uncommon Designs 

Tuesday, February 4, 2014

My next big project.

Pin It

In January, when the whole country was suffering from cold temperatures and crazy snowstorms, we had drought and fairly mild weather. We had literally not a snowflake pretty much through the whole month. But winter is back. Definitely. It's been snowing for the past two days, and will keep going on and off all week. So we are kind of stuck at home.

To make things even more boring, I don't have any work assignments right now so it was time to do some household work (no excuses any more!). I wiped the fridge inside and out, organized our linen closet, deep-cleaned the kitchen. But on the back of my mind there was always the "dreaded room"...

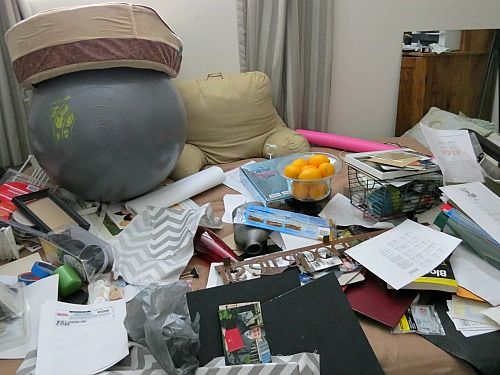
Do you have a room or a place in your house where everything ends up? Well, you guys are awesome! I'm embarrassed to admit that I do. It's worse than you might think. Don't believe me? Well, here is the proof:

 photo IMG_0705_zpsc3cfcc90.jpg

Hello, my name is Lena, and I'm a hoarder... I am ashamed... There are many-many projects  collected on this couch... The saddest thing about it is that it used to be a guest room. And now it's just a dump room for everything and anything. The floors are slightly better but this futon is pretty much covered with junk. It was time to clean it...

But I wanted to do something bigger and better.  And here is the reason why: a few weeks ago I had a long conversation with my Mom. Her treatment is going really well right now, and the doctors are pleasantly surprised with her progress. So I'm cautiously hopeful... On the other hand, after all this stress, my Dad started having issues with his heart. It's just so hard to be away from them! So they are thinking of coming to visit us after Mom finishes her treatment. We will probably be helping them partially with the tickets. We just miss them so much and want to be closer...

So in the next two months Hubby and I will be transforming this room top to bottom. Honestly, I always hated it. It's pretty small and dark, with low ceilings. There is not much we can do about the ceiling but we can change many other things to make it more functional for both them and us because, even though this place is small, it still has to serve many purposes.

We decided on a budget of $900. I know it sounds like a lot of money but it's not. Because, first, we need to replace that sad futon. It served us well for the past eight years but it's time for it to go. It's old and, definitely, not a good fit for two not very healthy parents.

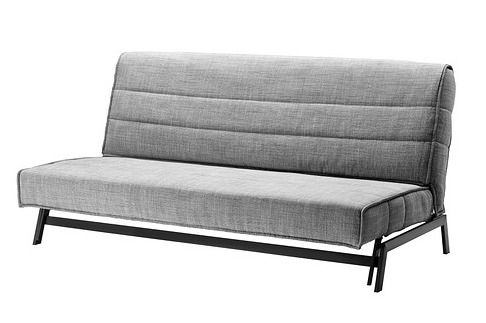
Unfortunately, this room is too small to have a decent sized bed in it and still be functional. After looking everywhere we finally found this sofa bed from IKEA:

 photo karlaby-killeberg-sofa-bed__0175878_PE328959_S4_zps31d4eeb8.jpg

It's fairly big, comfy and pretty. I'm very pleased with our choice. But it will also eat almost half of our planned budget. I told you it wasn't that much :)

There are so many things we want to do with this room. I will tell you more as we will go through the process. And at the moment, I can just promise that it already looks a lot better than it did in the picture above :)


Saturday, January 25, 2014

Finally, a finished project here... A command center #2.

Pin It
About a year ago I shared with you our Command center. This project is still one of the most popular on my blog. Almost every day somebody stops by that post.

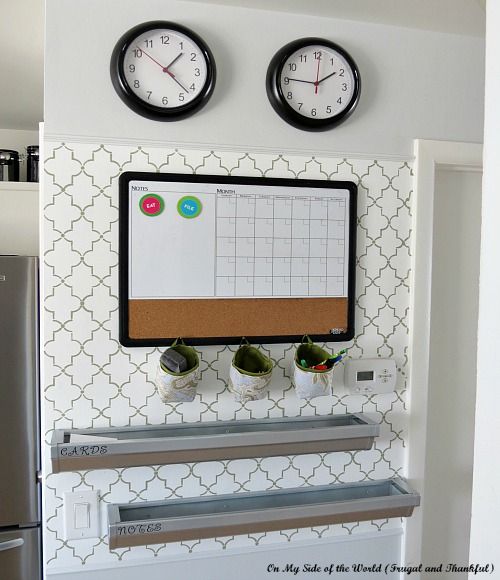
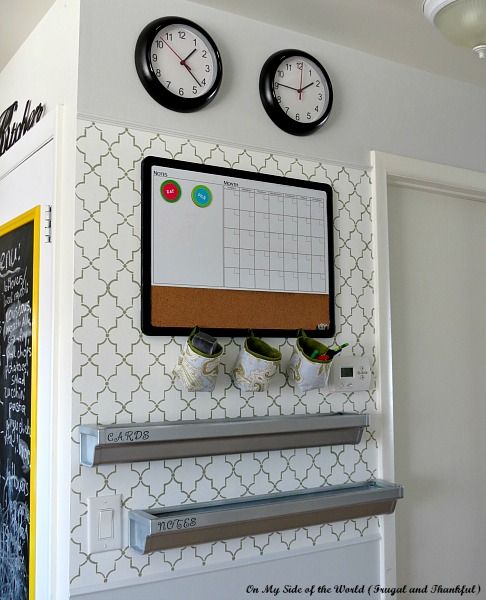
But, as much as I loved it, it didn't work as well for the rest of my family. Especially the kids because they didn't really like that our family calendar was in the master bedroom. So I finally agreed to move the command center to a more visible and accessible spot, aka our kitchen. Here it is in all it's beauty:

 photo IMG_0668_zps740697d0.jpg

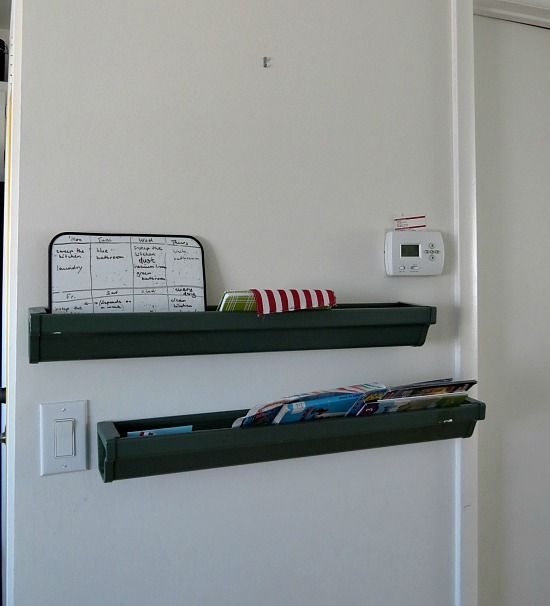
For the longest time we had this sad spot in our kitchen:

 photo IMG_0624_zps86073938.jpg

At some point I had a picture hanging there too but I took it off a long time ago. These shelves were made of leftover pieces of gutter and I loved them. So I reused them in the new command center (just spray-painted with Rustoleum metallic paint that I already had on hand and added vinyl letters).

The whole process was a "use what you have on hand" thing. Hey, I'm doing a No Spend challenge this month after all, right? :) And I didn't spend anything. It was a zero dollar project :)

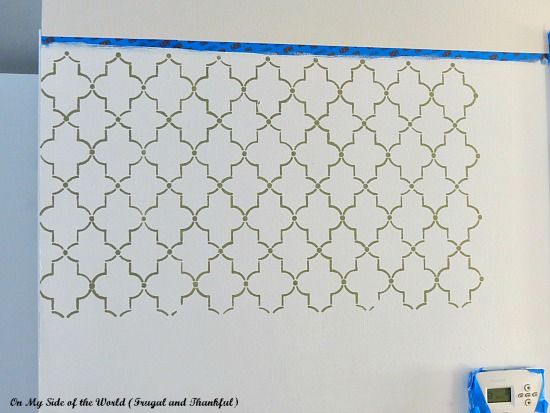
First, I stenciled the wall with the same stencil I used for our ceiling fan update:

 photo IMG_0640_zpsff16ca59.jpg

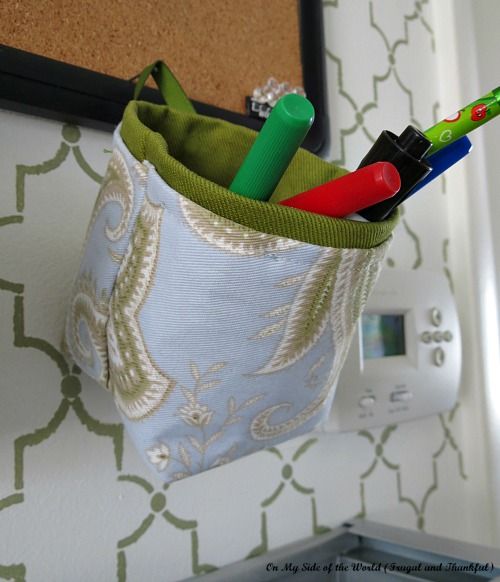
The paint was a "custom mix" (I basically mixed together some leftover paints I had on hand to get this mossy-green). Hubby then framed it for me with some thin molding that we had in the garage. I wanted to add some fabric baskets too. At first, I fell in love with these ones from IKEA. The small baskets seemed perfect! But there were only two in each set, and I needed three. I wasn't about to spend $12 and end up with three more baskets I didn't need (no, I'm not that cheap. It's all about the challenge:). The solution? Make it myself, of course! Ha, I have actually sewn something again. Can you believe that???

After looking through a ton of pictures on Google, I found this tutorial. Her instructions are so easy to follow, even for a novice like me. I really like how they turned out:

 photo IMG_0671_zps80c59810.jpg

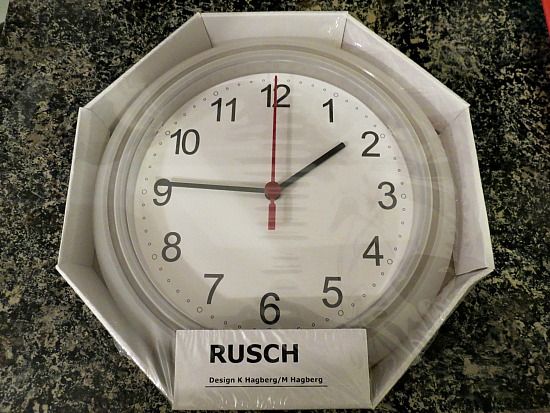
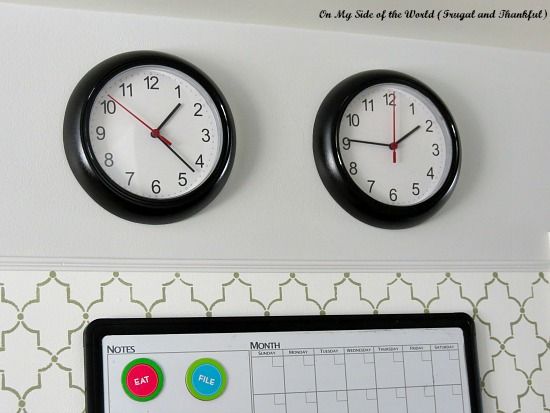
Again, I just used scraps of fabric I had on hand but they match other house decor perfectly. The last thing I added was the two clocks on the top. Why two, you might ask? Well, one shows the local time, another one - time back home in Russia. I happened to have these two clocks from IKEA that I bought a while ago:

 photo IMG_0644_zpsae5833a2.jpg

They were only $1.99 each but kind of ugly and cheap-looking. So I just taped the ... and sprayed them black. So much better:

 photo IMG_0674_zps009d006d.jpg

A little paint makes such a difference!

I love how it all turned out. And more importantly, the rest of the family likes it too :) And this spot doesn't look very sad any more:

 photo IMG_0679_zps8e9d8531.jpg

And now I just need to go and re-fill this empty calendar :)

I shared this post with these awesome parties:

Elizabeth and Co    Thrifty Decor Chick    The REAL Housewives of Riverton    By Stephanie Lynn
The Shabby Nest      DIY Show Off 

Saturday, November 9, 2013

I painted my walls black...

Pin It

It's been a little quiet on the blog here in the past week because I was painting, people!! Be prepared, this post is a picture dump :)

I haven't done any home related projects in so long. And it's not necessarily because we couldn't afford it this summer. For many projects I bought supplies back in spring and never finished them, either due to lack of inspiration or just because I was too tired and busy with other things.

This was one of the projects I planned to do forever ago, got everything I needed and promptly put all the supplies away for 5 months. But with only one week of unemployment left (now that sounds weird) and winter quickly approaching, I knew it was time to finish this one area of our house:

 photo IMG_0297_zps76d7f5ee.jpg

(I 'm so not good at taking the "before" pictures... As you can see, I forgot again...:)

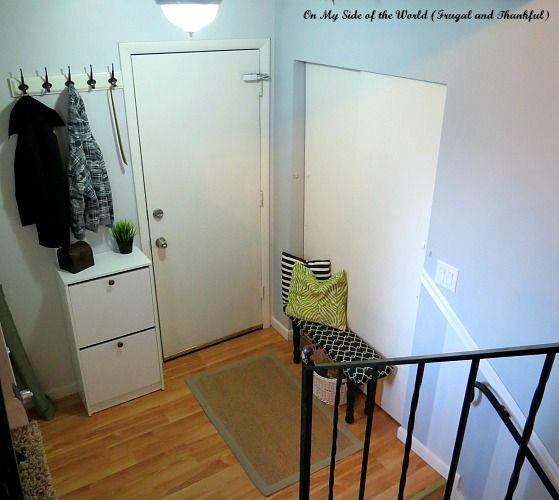
We have a tiny landing in front of our front door - now that's a tongue twisting sentence :) It really is tiny. You cannot have more than two people standing there comfortably at the same time. Yet this area is the first one people see as they enter our house.

It was a sad spot... The area had dirtiesh-white walls and tons of forgotten shoes on the floor.  Those of you who have been reading my blog for a while (and if you are new here, then Hello, hello. I hope you will stay for a while :) know that I'm not fond of white walls. Somehow they remind me of hospitals. It really is funny because in most of the hospitals I've been to, I didn't see that many white surfaces. I digress...

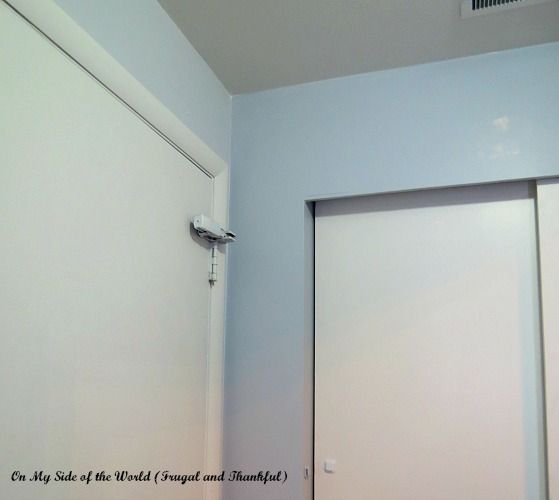
I wanted to add a little color to it. Nothing crazy, just a beautiful soft grey. I chose two tones for different walls - Gravity and Polar Star (both by Valspar. We used the second color for our living room). it's really hard to see from the photo above because this landing area is so small and dark but, maybe, this corner picture will show both colors a little better:

 photo IMG_0305_zpsad4e07bf.jpg

Nah... It almost looks blue but I promise it's not. It's such a beautiful warm grey. Might just be my new favorite color...

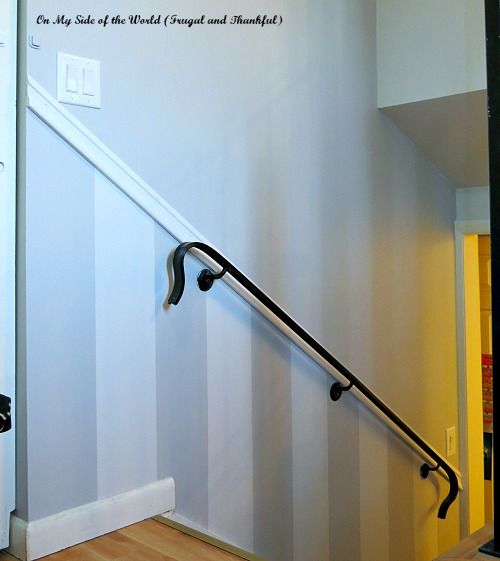
We also added stripes and a chair rail to that boring wall above. So much better now:

 photo IMG_0310_zpsf0c45539.jpg

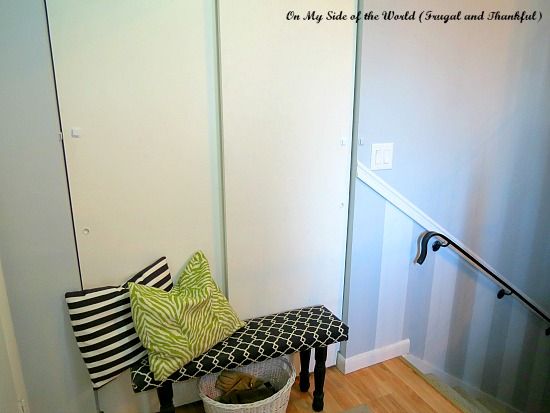
And another one:

 photo IMG_0303_zps1b0af6bc.jpg

I wish this area would have a little more light - it's so hard to take pictures there.The wall with the stripes will be a place for a photo gallery that I'm still working on (another project that I want to finish before Christmas). And this bench might be the very first thing I made when we moved to this house, almost five years ago. And I still love it :)

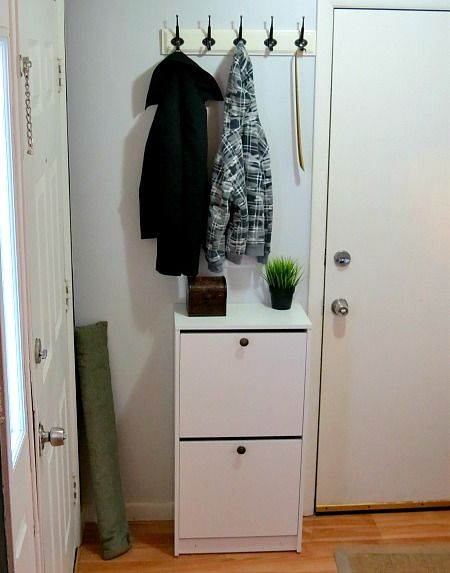
We also bought this shoe organizer from IKEA. Great price but it seemed too plain, so I added a couple of knobs (already had). Now it contains all the shoes that we wear regularly. No more mess in front of the door :) And the coat hanger was already there (got it last year, also from IKEA):

 photo IMG_0301_zps4a58167c.jpg

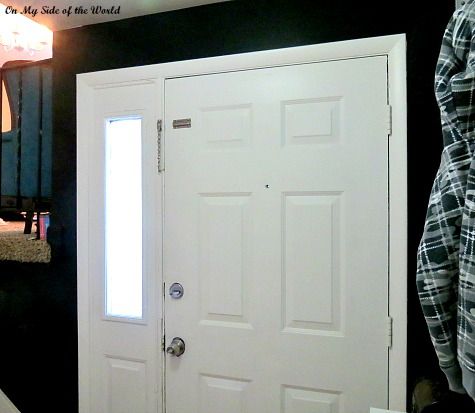
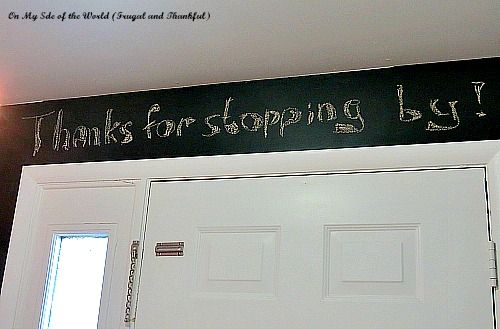
Now you might be thinking, "OK, that's all good but none of these walls look black??" And you are right :) Still, I did add some black. Well, not just black but chalkboard black. And I love it!! Love it love it love it!!

 photo IMG_0306_zpsee154785.jpg

 photo IMG_0316_zps0fdd4592.jpg

Here's my awesome black wall :)  It's a great spot for writing small messages and reminders for my boys. Now you can start calling me crazy :)

And here's the finished room spot:

 photo IMG_0320_zps5e7f8238.jpg

And as it says above, "Thanks for stopping by our modest habitat :)"

I shared the project with these awesome parties:

Uncommon Designs  Under the Table and Dreaming    Thrifty Decor Chick     The Shabby Nest   DIY Show Off


Related Posts Plugin for WordPress, Blogger...