About a year ago I shared with you our Command center. This project is still one of the most popular on my blog. Almost every day somebody stops by that post.
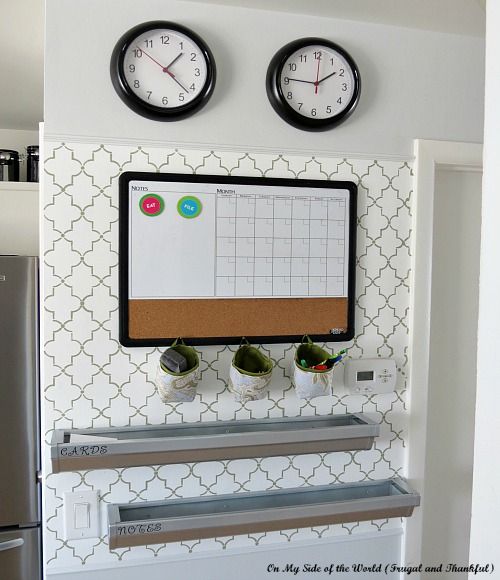
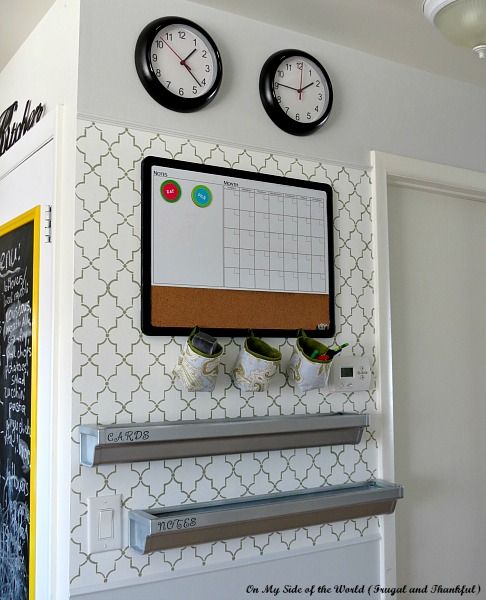
But, as much as I loved it, it didn't work as well for the rest of my family. Especially the kids because they didn't really like that our family calendar was in the master bedroom. So I finally agreed to move the command center to a more visible and accessible spot, aka our kitchen. Here it is in all it's beauty:
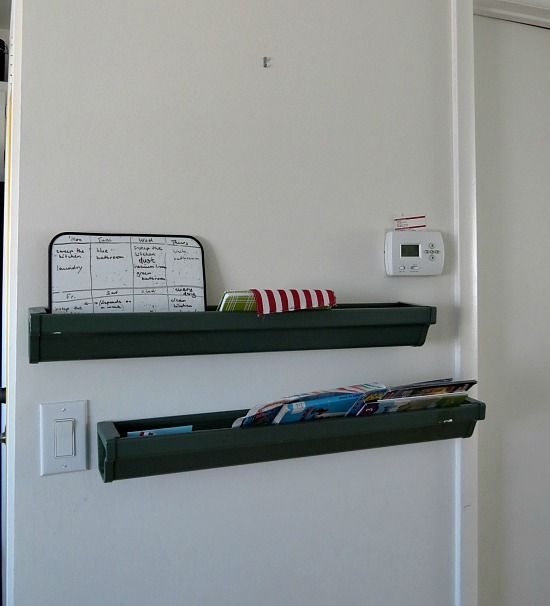
For the longest time we had this sad spot in our kitchen:
At some point I had a picture hanging there too but I took it off a long time ago. These shelves were made of leftover pieces of gutter and I loved them. So I reused them in the new command center (just spray-painted with Rustoleum metallic paint that I already had on hand and added vinyl letters).
The whole process was a "use what you have on hand" thing. Hey, I'm doing a No Spend challenge this month after all, right? :) And I didn't spend anything. It was a zero dollar project :)
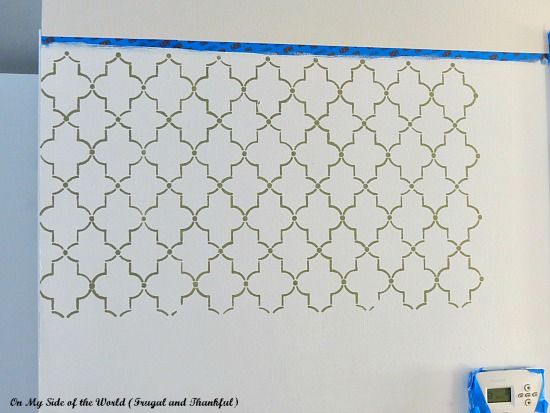
First, I stenciled the wall with the same stencil I used for our ceiling fan update:
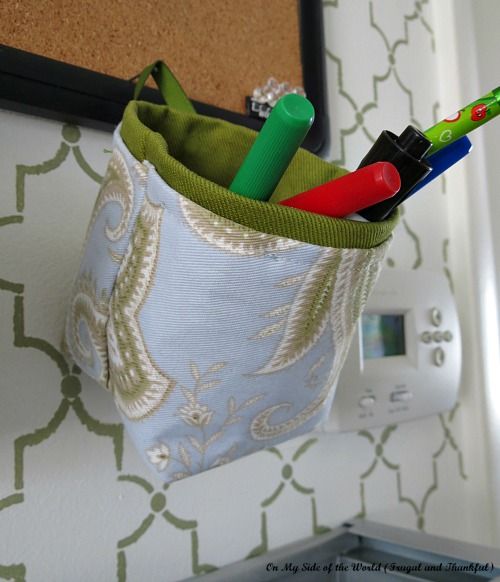
The paint was a "custom mix" (I basically mixed together some leftover paints I had on hand to get this mossy-green). Hubby then framed it for me with some thin molding that we had in the garage. I wanted to add some fabric baskets too. At first, I fell in love with these ones from IKEA. The small baskets seemed perfect! But there were only two in each set, and I needed three. I wasn't about to spend $12 and end up with three more baskets I didn't need (no, I'm not that cheap. It's all about the challenge:). The solution? Make it myself, of course! Ha, I have actually sewn something again. Can you believe that???
After looking through a ton of pictures on Google, I found this tutorial. Her instructions are so easy to follow, even for a novice like me. I really like how they turned out:
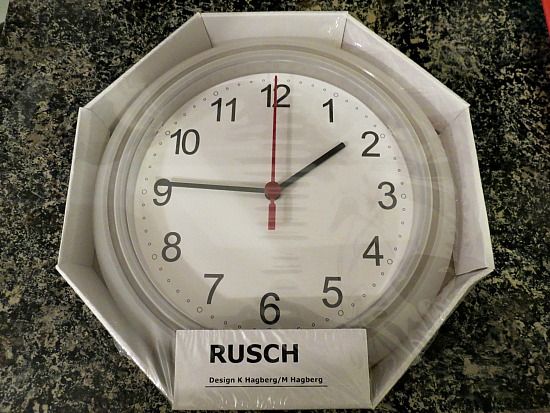
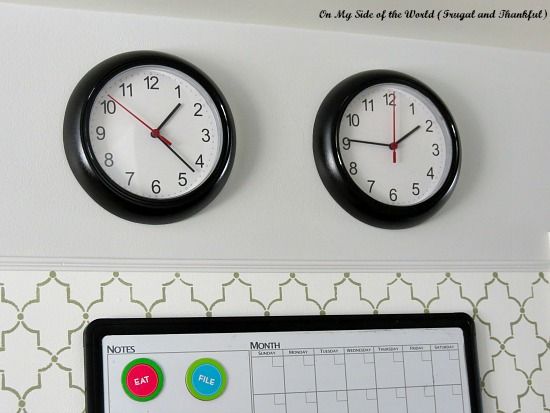
Again, I just used scraps of fabric I had on hand but they match other house decor perfectly. The last thing I added was the two clocks on the top. Why two, you might ask? Well, one shows the local time, another one - time back home in Russia. I happened to have these two clocks from IKEA that I bought a while ago:
They were only $1.99 each but kind of ugly and cheap-looking. So I just taped the ... and sprayed them black. So much better:
A little paint makes such a difference!
I love how it all turned out. And more importantly, the rest of the family likes it too :) And this spot doesn't look very sad any more:
And now I just need to go and re-fill this empty calendar :)
I shared this post with these awesome parties:
Elizabeth and Co Thrifty Decor Chick The REAL Housewives of Riverton By Stephanie Lynn
The Shabby Nest DIY Show Off


Looks amazing. Love the stencil work. And the two clocks great idea. Using up guttering is a good idea but unfortunately our left overs this ) shaped and can't find any use for it at the moment.
ReplyDeleteCarolx
Hmm, I have to say, I've never seen gutters shaped like this before:) You could, probably, connect two pieces and make a fun planter for outside?
DeleteI really like that you added the two clocks. Where do you have a calendar for future things?
ReplyDeleteOh, this is just for the immediate stuff my family has :) I still have my planner and a bunch of notebooks.
DeleteLooks AWESOME!!!
ReplyDeleteThank you, Rachel!
DeleteNice, Lena!! Aside from being so pretty to look at, the whole wall is so creative and functional! I LOVE the fabric baskets you made- it all goes together so nicely. You get an A++ for this project! :)
ReplyDeleteOh, you are so sweet, Dawn! Thank you :)
DeleteThis turned out so cute! Love the stenciled wall!
ReplyDeleteI love it Lena...It looks neat and modern and simple all at once.
ReplyDeleteI like your idea to use two clocks. My parents are also on a different time zone, and I am calling them more and more lately because of my dad's health. It's easy to forget to do the math.
ReplyDeleteOk.. you are just all kinds of AWESOME girl!! Seriously!! Love it!
ReplyDeleteLena, that is not sad spot anymore. It is so good and truly looks like a magazine project.
ReplyDeleteyou did great! hope it helps with organization and such.
I love the background design you chose. This looks pretty AND functional. XOXO
ReplyDeleteLena I love it. I have a spot in my kitchen that has the monthly calender, spot for notes for each other and all that. I am thinking I might try this just on a smaller scale(smaller spot). And I never thought of spray painting the clock and I have hated my white one for about 10 years. What grate ideas :)
ReplyDeleteIt just looks fantastic! Love the whole thing, especially the clocks. Pardon my curiosity, but is the other clock for Russian time? I am curious because there's as much as 22 min difference. It's just my OCD showing, I swear, but I love how they look. I've always liked how clocks show two different times, but never seen odd hour differences like half hours.
ReplyDeletelooks great, love the stencil!
ReplyDeleteI love it! Looks so great! I'm sure that your family will love it and use it and it will help you to have more great time together ;)
ReplyDeleteYou're becoming so crafty! Good work with the fabric baskets - they are so cute! What a great way to stay organized and on top of your bills :)
ReplyDeleteWow, this looks really great.
ReplyDeleteYou are so creative, I just love this idea. Might even do one myself above my desk in my sewing room.
ReplyDeleteYou really are talented! I wish you lived closer, my house needs work!
ReplyDeleteTurned out awesome! Thanks for sharing at our party!
ReplyDelete~Jenn
housewivesofriverton.com
Oh wow that looks great! Gosh I need to make one of those.
ReplyDeleteLooks great! I have been gathering supplies to make a command center in our home. Love how yours turned out!
ReplyDeleteWe would love for you to come and link up at Your Designs This Time, Mondays 8:00am EST.
http://www.elizabethjoandesigns.com