Pin It
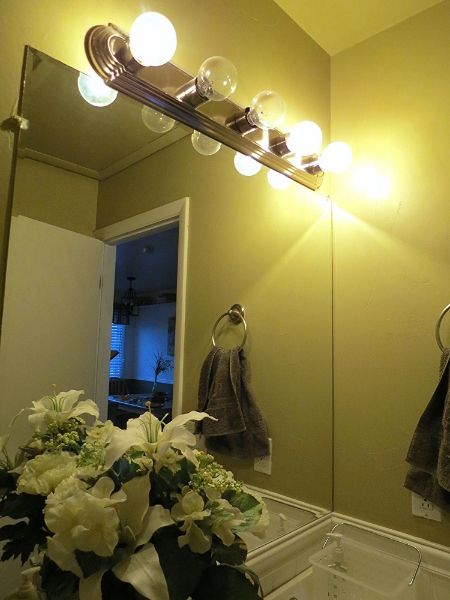
When we first moved into this house, every single wall in it was white. And you all know that I love me some color. So I painted, and painted, and painted. But I wasn't very experienced in choosing the right color. And the color I used in our half bath was the worst in the history of my painting career to date. My husband lovingly called it "pukee-green" :) Originally it was this pretty olive color but it didn't look pretty on our walls (I tried really hard to make a good picture but it's impossible with this light):
This bathroom also had an ugly light, way oversized mirror and...well, the fake flowers that my sweet Hubby got for me. He tried :)...
On the other hand, the previous owners (one of them was a realtor) put the new nice vanity, wainscoting along the walls and a new toilet (you should've seen the toilet seat cover there was there originally. It was transparent-blue with sparkles!! Too bad I didn't take a picture back when we were touring this place!)
So we lived like this for 3.5 years, and it would, probably, stay like this for a little longer if it wasn't for this:
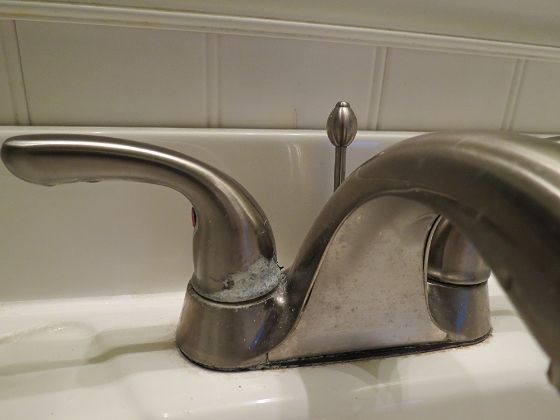
This is what kind of put me over the edge. The previous owners, right before they put this house on the market (they were not living in it at the time) replaced an old faucet with a new one. But it was the cheapest one on the market (I later found it in Walmart). It looked good at first but a year or so later it just started to chip.
This bathroom gets the highest traffic in the house. It's between our living room and kitchen, and everybody who comes to our house, uses it. And we all use it throughout the day. To be honest, I didn't know how dangerous it was (especially with the kids), if it was getting rusty or moldy. So we knew, the faucet had to go. We talked about it and decided that it was time for a few changes that we planned for a while.
But because we don't have much money, our budget was no more than $200 for everything. So do you want to see what we did??
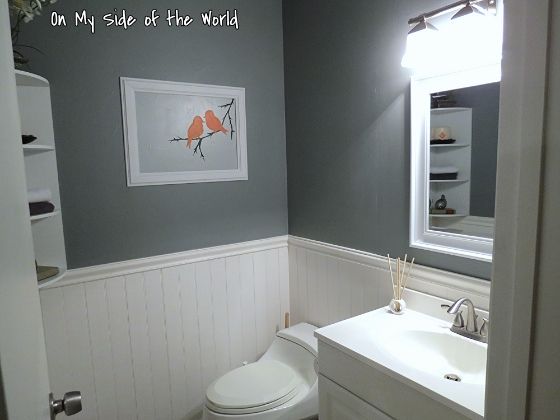
Welcome to our new half bath. Let's have a little tour:
First, it was all about choosing the color we both loved:
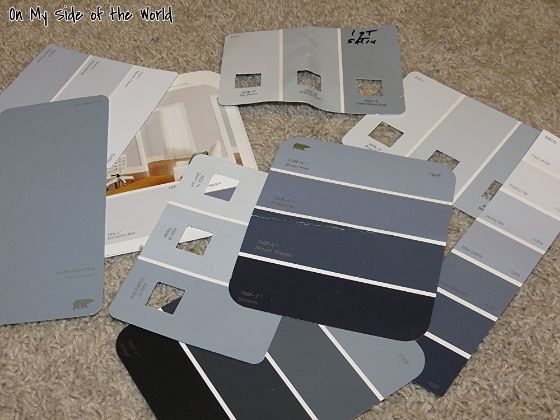
We wanted this bathroom to be traditional, pretty and serene. We both liked grey. After we narrowed it down to two of our favorites, we got little sample cans (one was free with Lowes Facebook promotion). I've learned my lesson with the "pukee" color! It's so worth it to pay $3 extra for a sample, believe me!
So finally we had a winner- Stone Mason Gray from Valspar in satin. It's such a pretty color! We are both in love!!
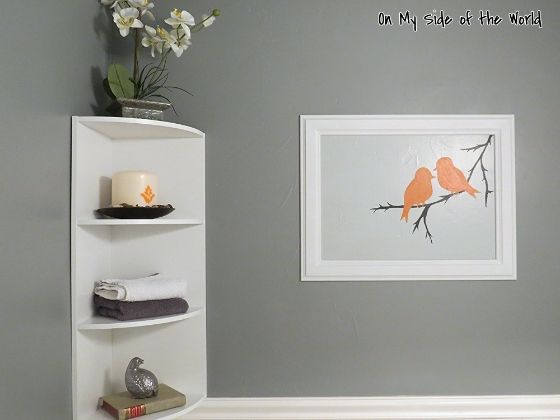
Then it was time to add a few other things. First, we hung a corner shelf. It was $7 clearance at Lowes that we bought last year:
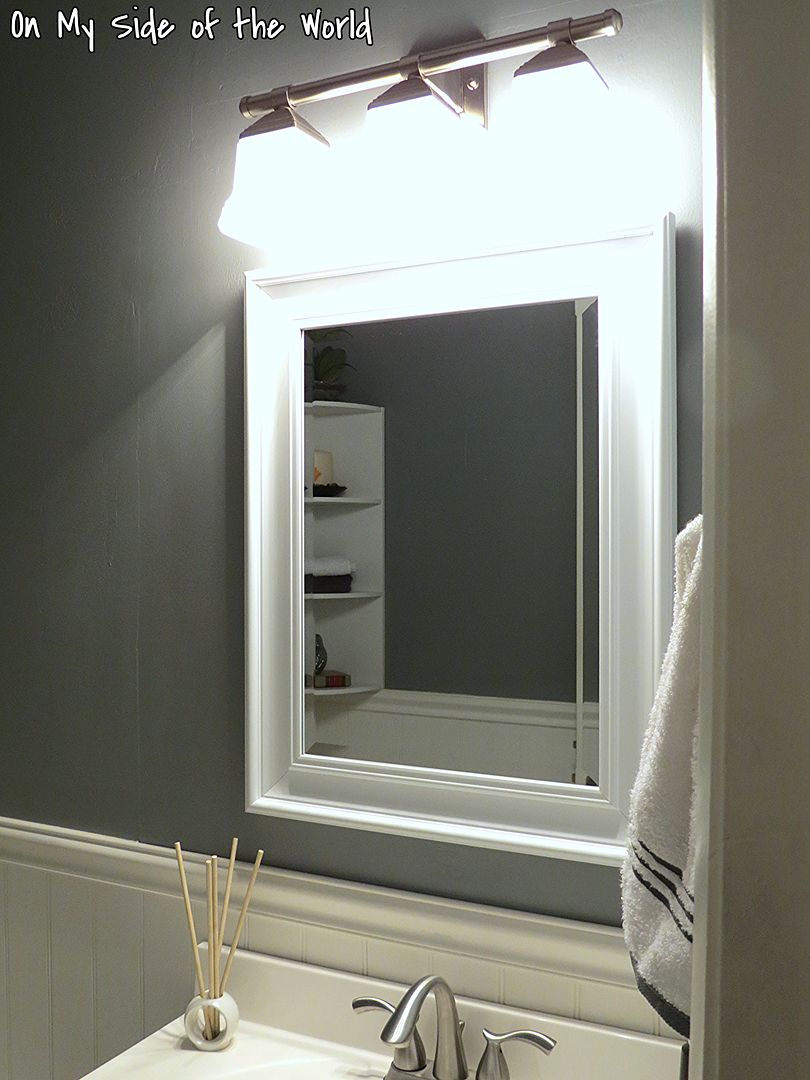
Then we got a new light. Well, new to us because in this frugal chez we never pay full price, right? :) We went on KSL (local classifieds) and found this light in perfect condition but for only $15 (so it was $33 savings, not counting taxes). I tried to make a picture but I have no idea how to get a photo of a lit up light. That's the best I could do:
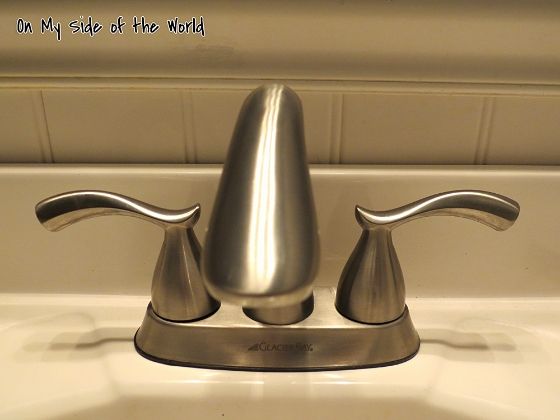
But you might've noticed my biggest score on this picture above. And no, it's not the little "vase" even though it was on clearance for only $2.50 at Lowes (and doesn't it just scream serene to you?). No, I mean the new FAUCET! I love our new faucet:
It's this faucet from Home Depot. But why did I call it my best score?? Well, because I found it at Goodwill for $15, brand spanking new, still in a box. I couldn't believe my luck! That's what to be in the right place at the right time means!
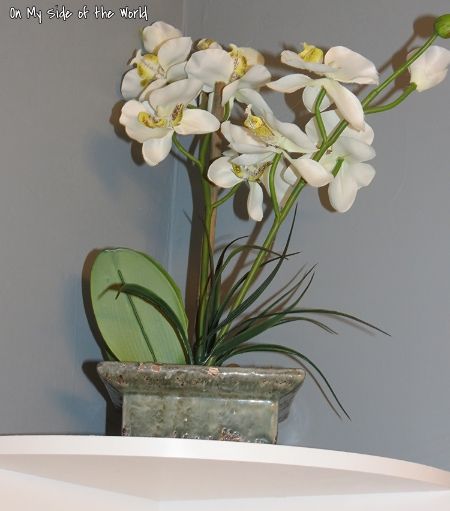
Then we added a few more things like a new mirror ($32 at Lowes, no deals here...) or this white orchid in a perfectly matching pot- $9.99 at Marshalls:
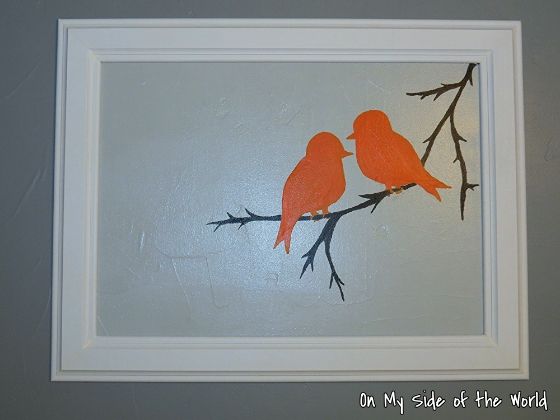
We also added a new chunky candle (from the clearance area at Walmart) and a few other accessories. But I couldn't find the perfect wall art. I wanted something simple but with just a little pop of color. This bathroom is so small, I didn't want anything bulky.
So after some thought I decided to make it myself. Right on the wall. And no, I'm not an artist by any means, and I'm not trying to pretend I am. But I like how it turned out, and it gives this bathroom just the right pop of color:
Then we simply framed it with some molding (and my Hubby had a chance to try his new saw :)
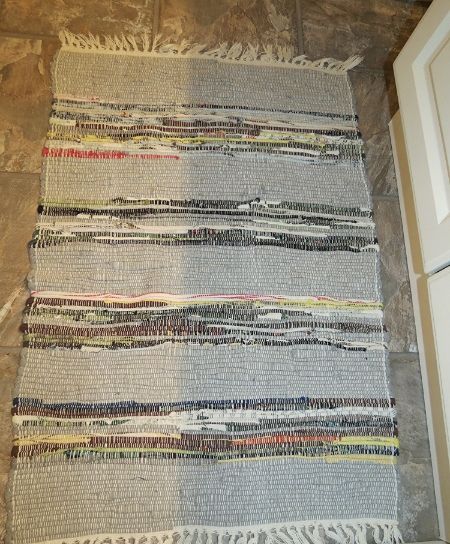
The last thing I added to our bathroom is this fun little rag from IKEA made from recyclable T-shirts. I actually already had it, so no money spent but usually it's only $4:
I love how simple it is and, mostly how easy it is to clean, and that is a must with two (three??) super-messy boys.
And that is the end of our little tour. Thanks for stopping by!
PS- Oh, and if you are wondering if we stayed within a budget, then yes!! Total spent on everything - $153.61!! I'm really happy with the results, and I have a little money left to use towards our laundry area re-do :) And the only reason I shared all these numbers with you is to show that it's possible to make a difference in your home even when you have a very tight budget. All it takes is some planning and looking for "treasures" :)
I have shared this post with these great parties:
Hookin Up HoH,
Sew Much Crafting
DIY Show Off
Blissful and Domestic
The Shabby Nest
Finding Fabulous
My Repurposed Life
Tatertots and Jello
Mop it up Mondays
Under The Table and Dreaming
Homemaker on a Dime
Family Home and Life
Thrifty Decor Chick
My turn (for us)
Chick on a Shoestring Decorating
Ginger Snap Crafts

Ok your not going to believe this but that is the exact color of our bathroom and I love it. It makes the bathroom look so much bigger and much more peaceful.
ReplyDeleteLove it
That's awesome :) I love how peaceful and serene it is right now! Much better than "green" we used to have!
DeleteA job wel done. Your half bath looks great. Your painting on the wall then framed is a great idea. Who said you can't paint, Its brilliant. I love the symplicity of it. Well done you have done a great job.
ReplyDeleteCarolx
Thank you Carol! Simple is what I was going for!
DeleteGorgeous - You did a great job with that room. I love the grey! XXX
ReplyDeleteOh wow! That looks great! It's really incredible what the right color can do with the bathroom! I really like this painting, it brightens the whole wall. Thanks for that inspiration!
ReplyDeleteI know. I definitely have learned my lesson about choosing the right color :)
DeleteWow, what a change!!! I would be afraid to have a potty room so nice, I would never get the hubby out of there with his reading material. Ha
ReplyDeleteOh, but that's my reading place :) That's how I escape from my kids:) The last shelf is for my book only :)
DeleteOh wow, I love that gray! My brother, when painting their first house, wanted gray walls. 12 cans of sample paint later, they settled for a tuned-down golden yellow! So I'm always surprised to see where gray works. Love that picture too with the birds. Very cute.
ReplyDeleteThat's my first grey in this house, and I love it! I always wanted to pay something grey :) But I started with a smaller "room" to be safe :)
DeleteSo nice Lena. We did the same wainscotting along with grey in our bathroom 4 years ago. It is warm and wonderful with the white trim. Another lovely job done by you and yours truly. x
ReplyDeleteThank you Cindy! I love how grey and white work together.
DeleteThree ???!
ReplyDeleteIncluding my sweet husband :)
DeleteI love it! Looks great :)
ReplyDeleteThanks Michelle!
DeleteI love it! Very well done! A nice balance between the grey and white then a pop of color with the birds. It looks great!
ReplyDeleteThank you!
DeleteLooks great in the pictures, but I am so glad I got to see it in person. It is even more awesome and inspiring.
ReplyDeleteThank you Amy! It's really hard to take pictures to show the right color in such a small space. I took about 50 pictures until I was more or less satisfied :)
DeleteLove the grey and bright white. Your birds are awesome!
ReplyDeleteVery classy re-do Lena. I would have never guessed you accomplished it so cheaply too!
ReplyDeleteBeautiful The bird print is my favorite part.
ReplyDeleteI'm still waiting for your tv show to start, it is only a matter of time. That painting is beautiful. The whole thing is beautiful!
ReplyDeleteWow, this is just gorgeous! Your painting is spectacular.
ReplyDeleteLove it! You did a great job. Love the orange of the birds with the gray walls. I am currently putting together everything to redo our main floor bathroom
ReplyDeleteLena... I have to be honest here... i'm a *little, tiny bit* jealous of your awesome decorating skills!!! I SO wish you lived nearby so you could help me with my house! I *LOVE* your bathroom!! It's beautiful! :)
ReplyDeleteGood job Lena! You are sooo talented both in decorating and finding bargains. Your bathroom looks great!
ReplyDeleteWonderful makeover on a budget! The gray really works in that space, too.
ReplyDeleteXOXO,
Meredith
It looks great! I have a half bath that is in desperate need of a makeover! I love the colors that you used!
ReplyDeleteThis looks awesome! Great job on the colors!!
ReplyDeleteVery nicely done. You shop like I do!
ReplyDeleteLooks great! you got some nice deals for in there :). I love redoing little bathrooms...you can make such a big difference so fast!
ReplyDeleteBeautiful! I love that color. You have inspired me to finish our bathroom. It needs a new wall color.
ReplyDeleteIt turned out beautifully! Love the color and the picture on the wall is fantastic!
ReplyDeleteWhat a great transformation, I love the color of the walls and the picture of the bird is fantastic
ReplyDeleteLisa
Creative Raisins
Very nice! I love the color you chose and your bird art!
ReplyDeleteSelene @ restorationbeauty.com
I love the bathroom looks great but wondering how did you remove the old mirror I have a big one like that does it just come off or was it glued to the sheet rock. I was wanting to redo mine but was puzzled about the mirror taking it down. Help please!!!!! Love the Birds yyou are so crafty keep up the good work. Kay
ReplyDeleteHey Kay. Thank you so much for stopping by. Our mirror was screwed to the wall with clams so it was just a matter of removing some screws :) I think if it's glued to the wall, you just need to slowly work your way behind with something flat (could even be a butter knife:) until it falls off or can be pulled off. And then you'll need to do a LOT OF sanding and patching :) Hope it helps. You can also just frame the mirror. That was my original idea too but our mirror was just too big for this place!
DeleteYou did so great with update! It looks fabulous and like you spent oodles of money. I love a budget makeover!
ReplyDeleteThis turned out great! I love the frames birds - so stinkin' cute!!
ReplyDeleteJen @ Noting Grace
Great job! I love the classic look with the brushed nickel, blue gray and bead board. The pop of orange in the artwork is perfect! (Yay for complementary colors!)
ReplyDeletegreat re-do on a budget! Love the color and the art!
ReplyDeletegail
your bathroom turned out great! The color is great! the fixtures really update the look.
ReplyDeleteLove the color, love the art and updates...what a sweet transformation, Lena! Beautiful work! Thanks so much for sharing your hard work in That DIY Party! :)
ReplyDeleteWhat a great job you did! I love finding bargains that can make such a big difference in a room. It looks great!!
ReplyDeleteI love the changes to your bathroom. Awesome paint colour and tap, it looks so clean and bright now!
ReplyDeleteLove your ideas, Lena. Now, you totally need to come to my place and give me some advises, please!!!
ReplyDelete